

Overview
“Transaction Generator” in fusionCore is actually two separate packages installed together. Understanding which is which matters, because the first does nothing useful on its own:- Transaction Generator (the base package, managed, namespace
FSPTG) is a generic, empty double-entry engine. It defines theJournal Entry Rule,Transaction, andTransaction Entryobjects and the batch/real-time logic that turns a rule into balanced debit/credit records — but it ships with zero rules. Installed by itself, it has nothing to do. - fusionCore Transaction Generator Add On (unmanaged, no namespace) is what makes it useful for a fusionCore org. It contributes three things: a one-time setup script that inserts 21 pre-built Journal Entry Rules encoding fusionCore’s standard accounting treatment; extra fields on
Transaction Entrythat trace each line back to the fusionCoreFinancial EventandFinancial Event Linethat generated it; and the wiring that plugs Transaction Generator into fusionCore’s existing Financial Period close process.
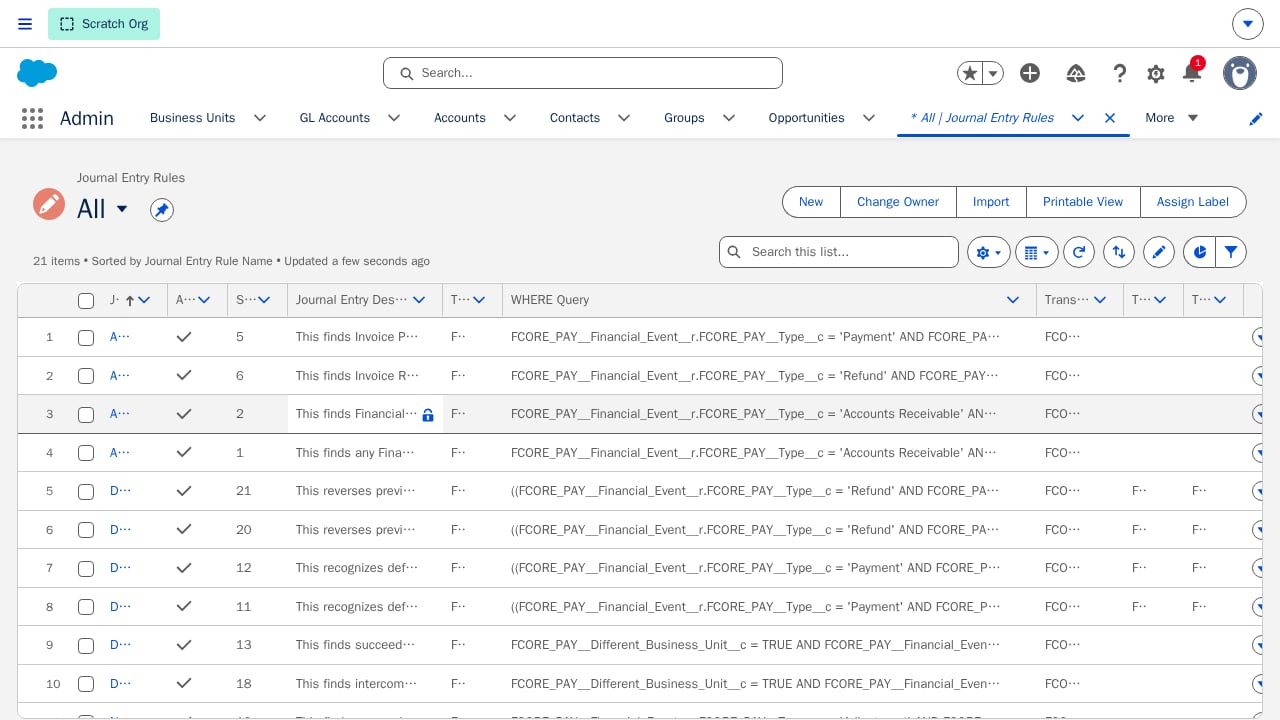
21 Journal Entry Rules installed by the fusionCore add-on's setup script
Key Concepts
- Journal Entry Rule — a reusable rule: a target object, a filter (
WHEREclause), and a JSON definition of the debit/credit lines to post. - Transaction and Transaction Entry — the generated double-entry records. A Transaction’s
Total DebitsandTotal Creditsroll up from its entries, and a formula flags any transaction where they don’t match. - A record is only picked up once — after a Transaction is generated for it, a date field on the source record is stamped, and the engine skips already-stamped records on future runs.
Creating a Custom Journal Entry Rule
fusionCore’s standard rules cover the common accounting treatment for fusionCore’s own objects. Create your own Journal Entry Rule when you need to post entries the standard set doesn’t cover — a different treatment for an existing object, or entries driven by a custom object.Create the rule record
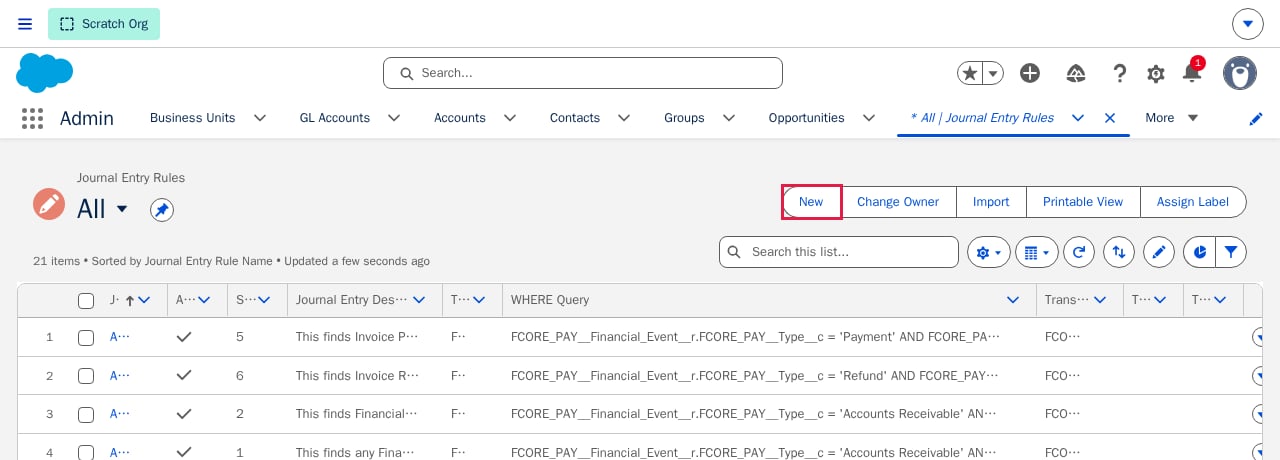
The Journal Entry Rules list — click New to start a custom rule
- Journal Entry Rule Name
- Sequence number (controls run order relative to your other rules)
- Target Object API Name (the object whose records this rule reads)
- WHERE Query (a SOQL
WHEREclause, without theWHEREkeyword, scoping which records it applies to). - Transaction Posted Date Field is required — the field on the target object (or reachable through a relationship from it) whose date becomes the generated Transaction’s date.
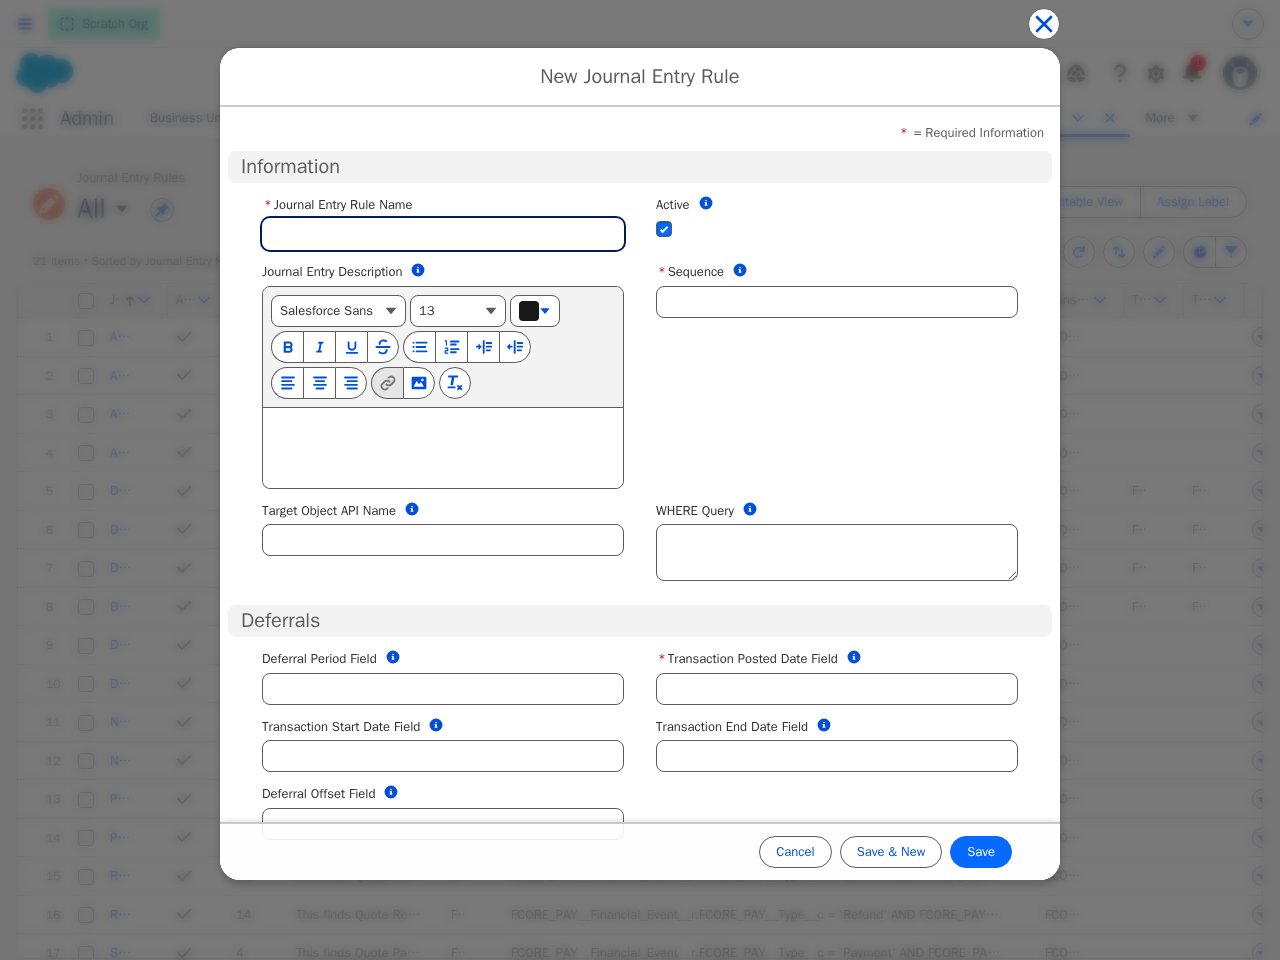
The New Journal Entry Rule form — Name, Sequence, and Transaction Posted Date Field are required
(Custom objects only) Add a Transaction Created Date field first
Transaction Generated Date Field setting on the Transaction_Generator__mdt settings record: in a fusionCore org with the add-on installed that’s FS_Transaction_Created_Date__c; on the base package alone it’s Transaction_Created_Date__c. If you want deferral or default-amount behavior for the custom object, the fields those options reference must exist on it too.Configure the debit and credit lines
WHERE clause — the filter that decides which records this rule fires on: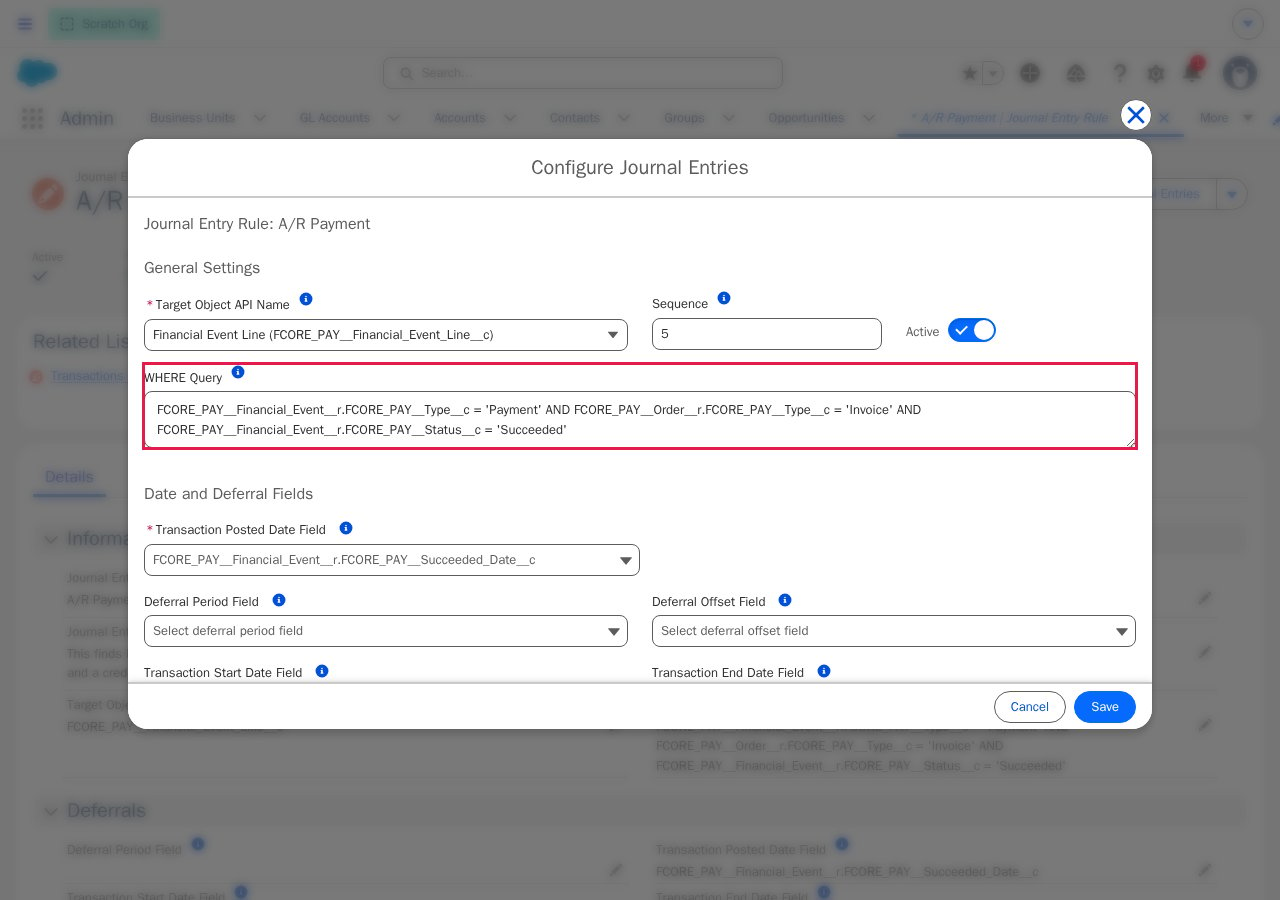
The top of the Configure Journal Entries modal: the rule's target object and WHERE Query
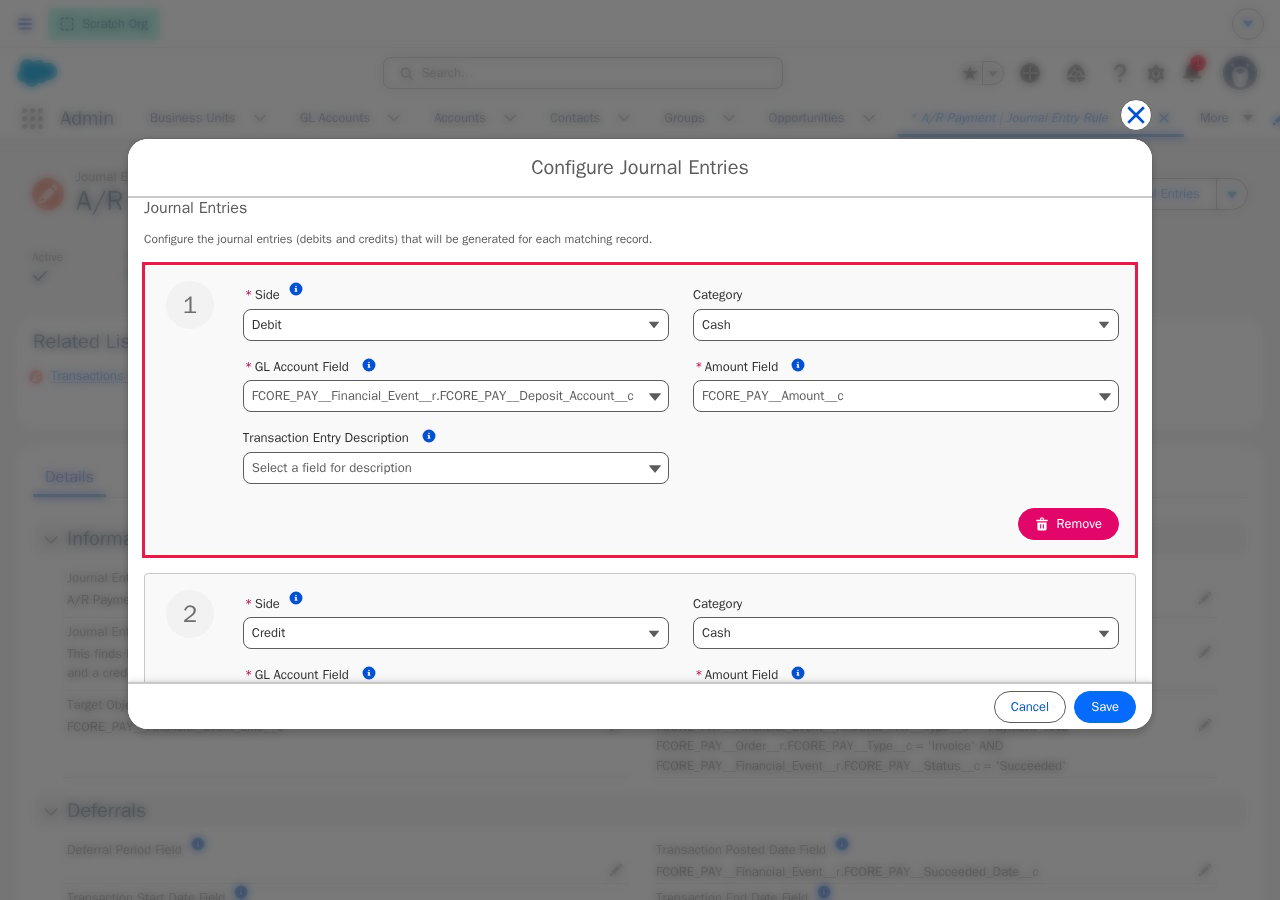
Further down the same modal: the debit/credit line editor
(Optional) Configure deferred revenue
Activate the rule
Choose how it runs
Transaction Generator job, running TransactionGeneratorBatch). For immediate, on-demand generation, add the View/Create Transaction Entries Lightning component to the target object’s record page — clicking it runs the same active rules against just that record.Transaction record (with rolled-up Total Debits and Total Credits) and its child Transaction Entry lines, linked back to the rule that created them.
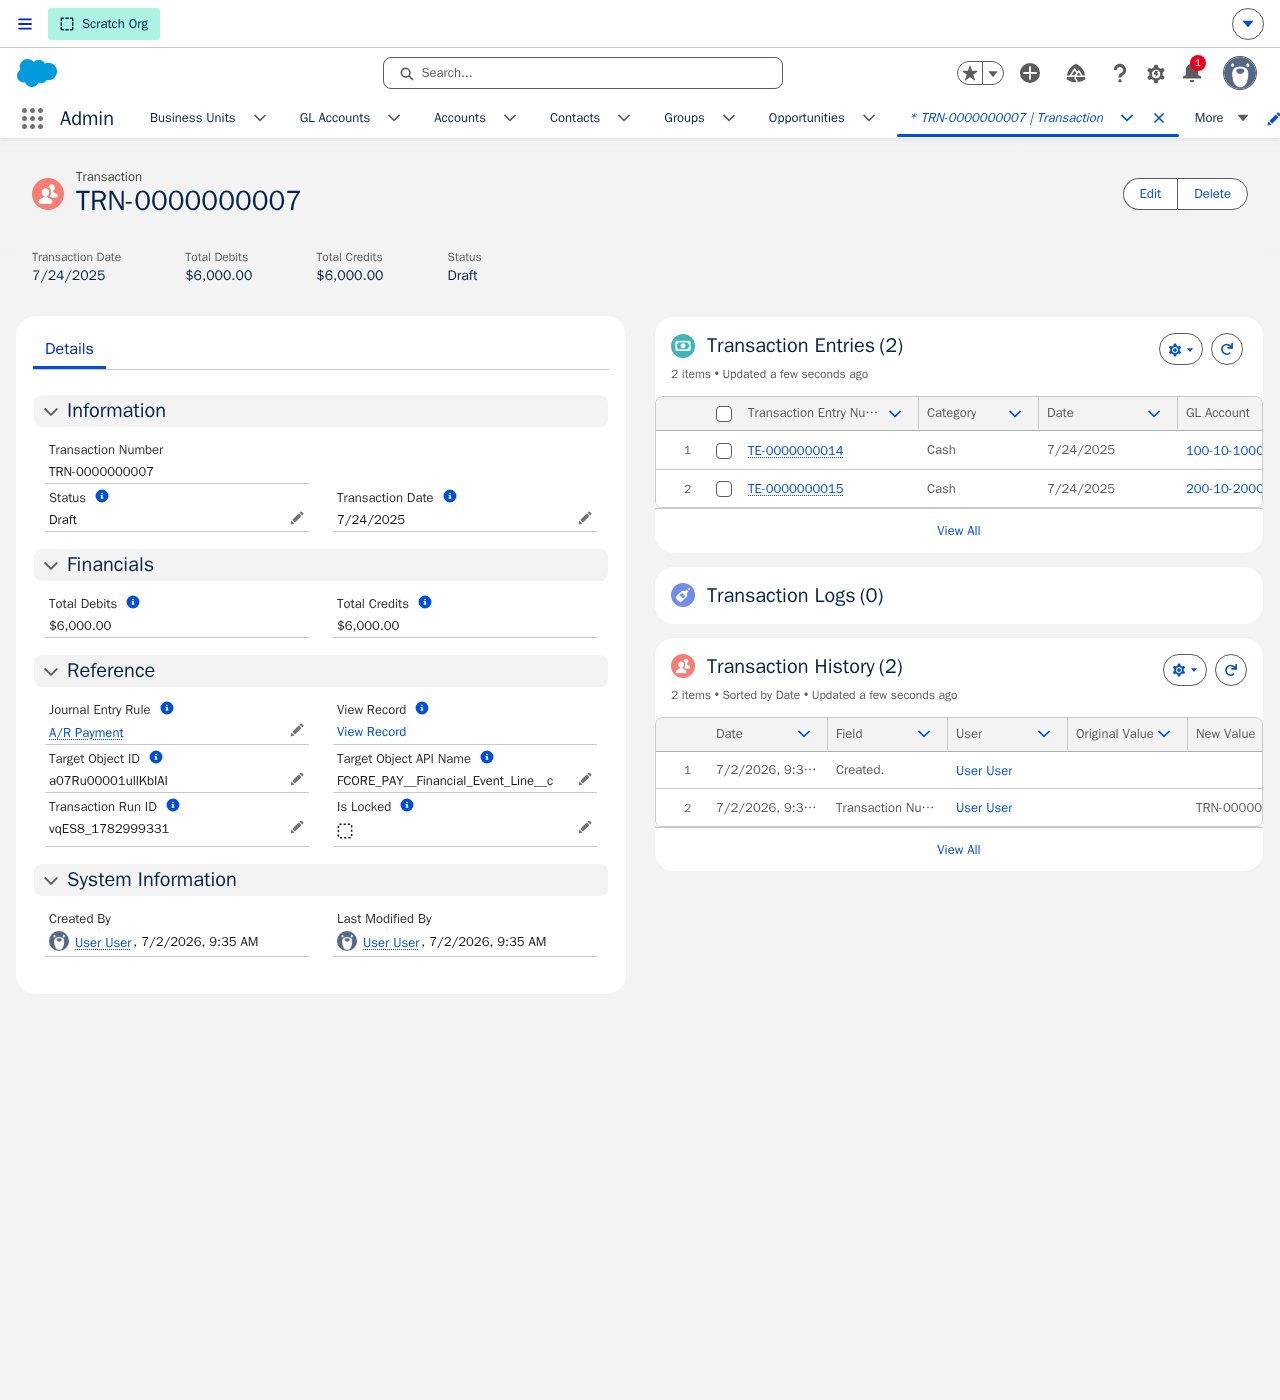
A generated Transaction, linked to the Journal Entry Rule that created it
Journal Entry Rule fields quick reference:
Worked Example: Recording Donations
Donations can reach Salesforce in many ways, so this example uses one concrete setup to walk the flow end to end. Foundation of Innovators is an association that collects donations in a fundraising system outside of Salesforce. As each gift is collected, the external system creates a Donation record (a customDonation__c object) in Salesforce, and the accounting team wants those gifts tracked as Transactions in Salesforce for ease of reporting. A custom rule does exactly that: when a Donation’s Status becomes Received, it posts the gift to the books automatically.
The accounting treatment. A donation is contribution revenue, not exchange revenue — the donor receives nothing of commensurate value in return — so unlike dues or event fees there is no service period to defer it over. The rule recognizes the full amount on receipt with a single balanced entry, and configures no deferral schedule:
Donation__c object carries these fields — the two GL Account lookups are what the rule’s journal entry lines will read, and the stamp field is the reprocessing guard from the earlier step:
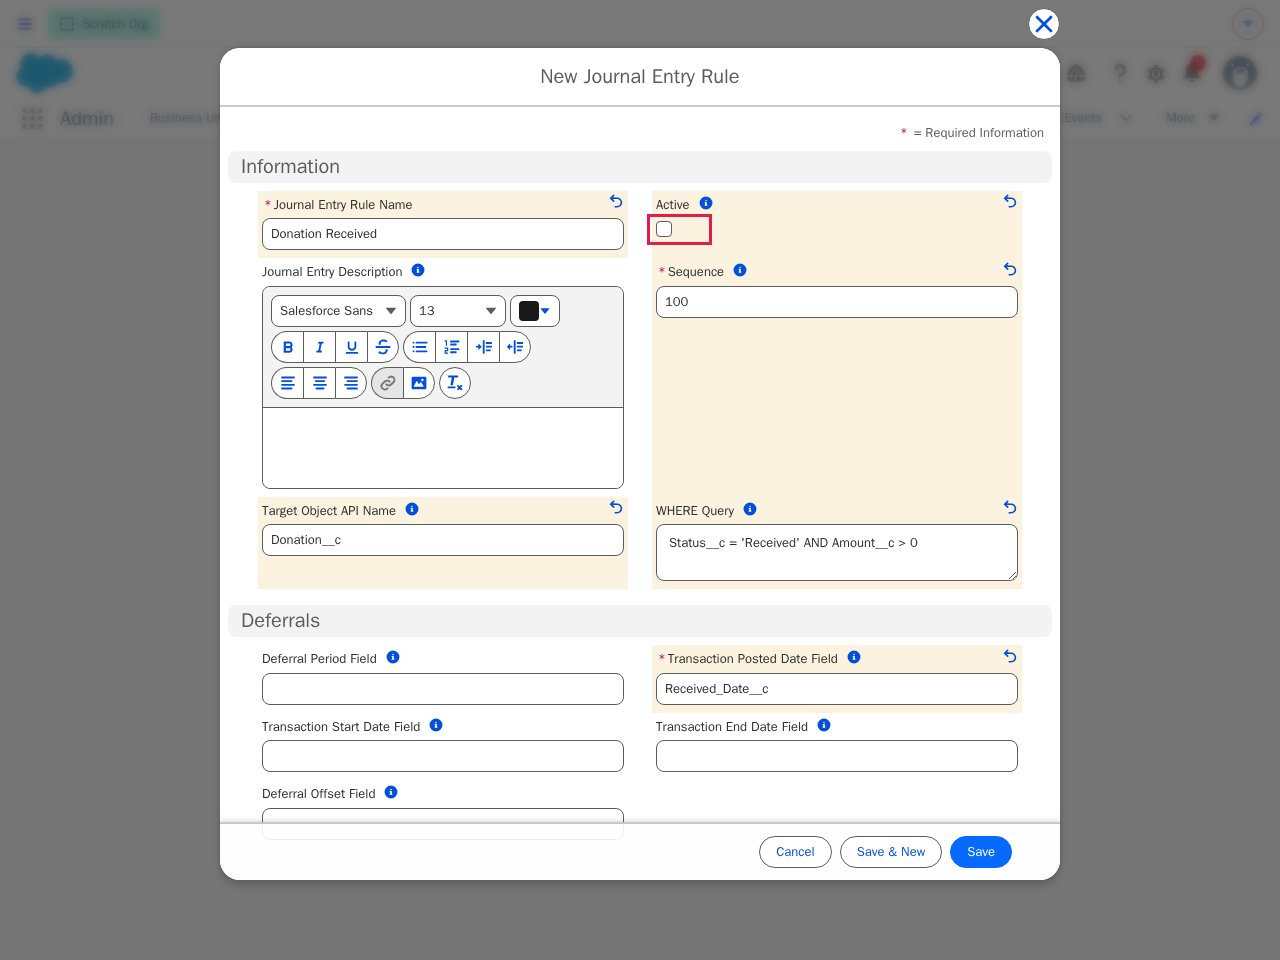
The filled New Journal Entry Rule form — Active stays unchecked until the lines are configured
Amount__c > 0 guard matters: without it, a zero or negative amount would generate a zero or reversed entry, which is not the correct treatment for a corrected or returned gift — a returned gift needs its own reversing entry.
Configure the two lines. Save the rule, click Configure Journal Entries, and add one Debit and one Credit line, both reading Amount__c:
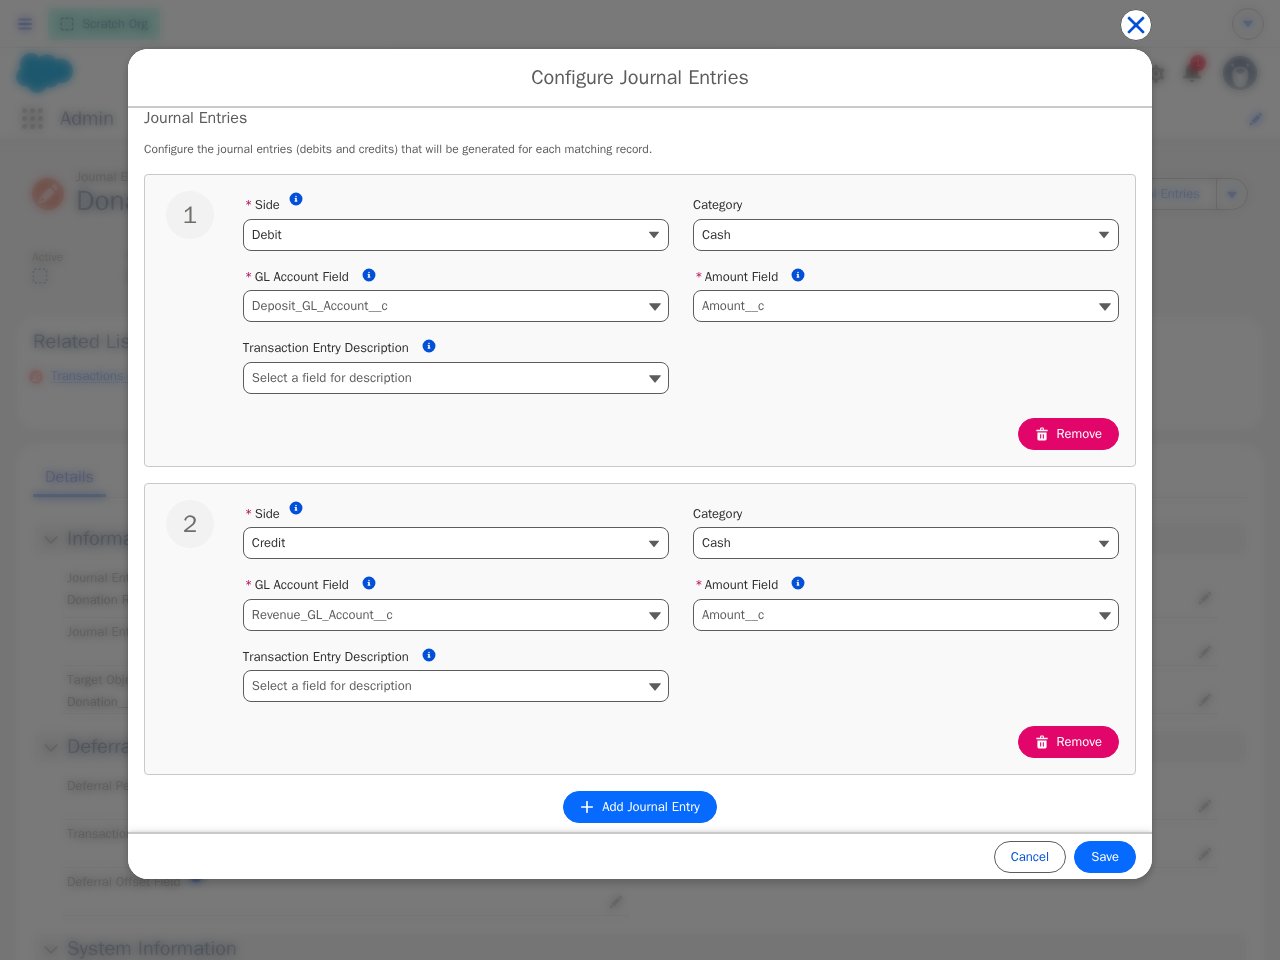
The configured lines: Debit to the deposit account, Credit to Contribution Revenue
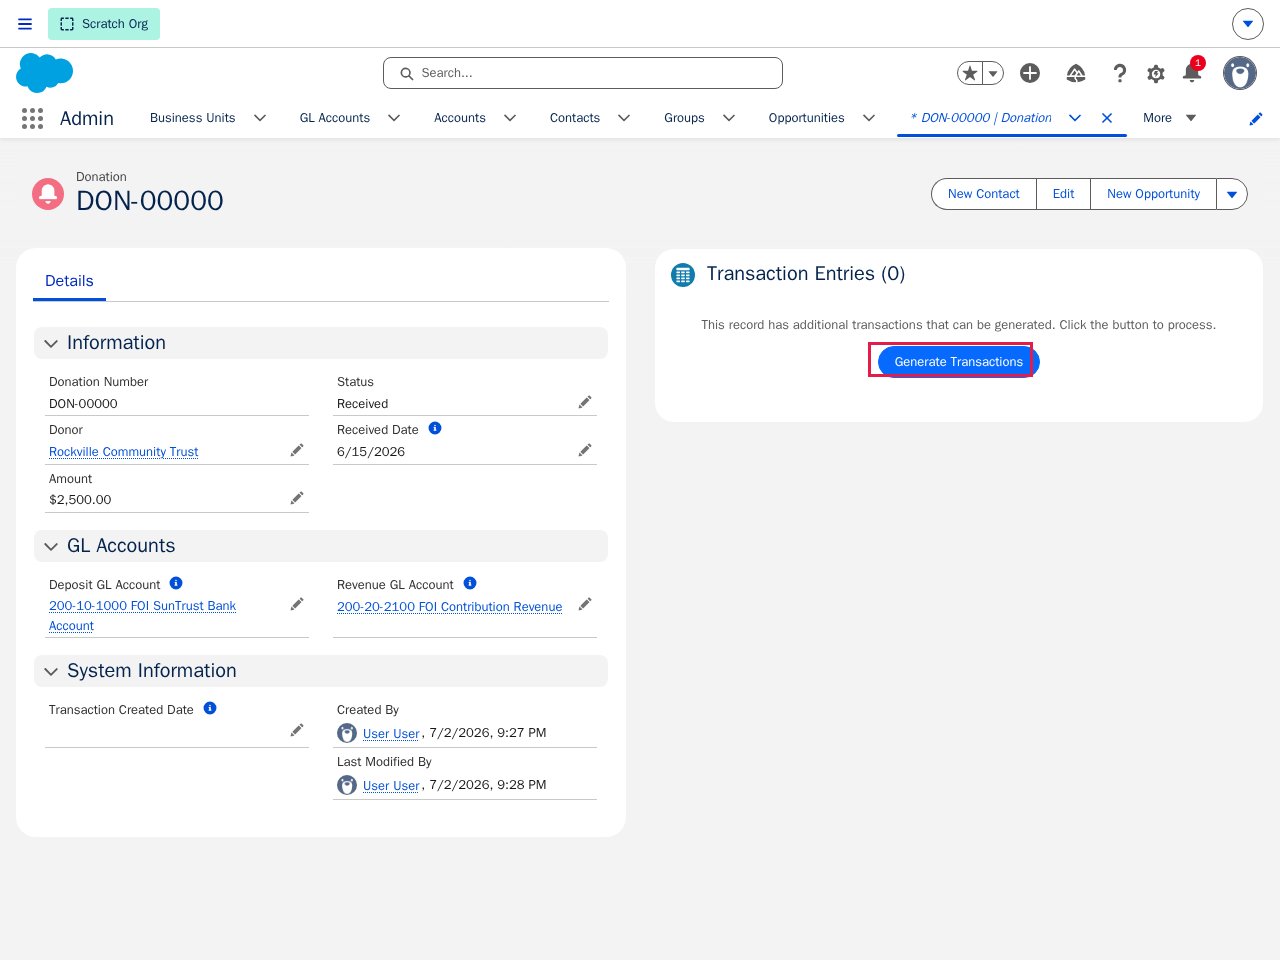
A received $2,500 donation, ready to post — the component sees the record matches an active rule
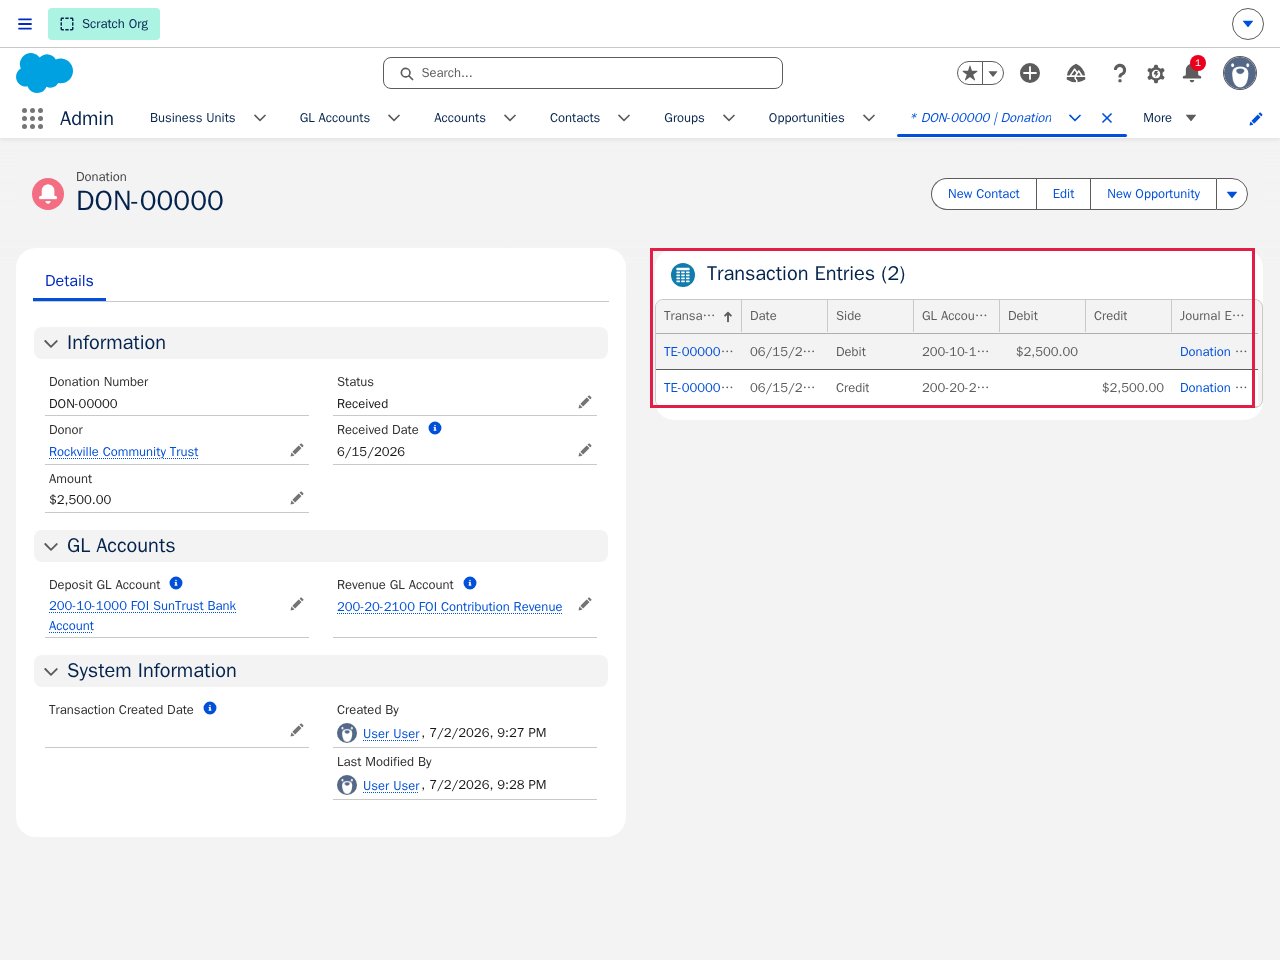
After generating: one balanced pair of entries, dated on the Received Date
FS_Transaction_Created_Date__c is now stamped, so the nightly batch won’t pick it up again:
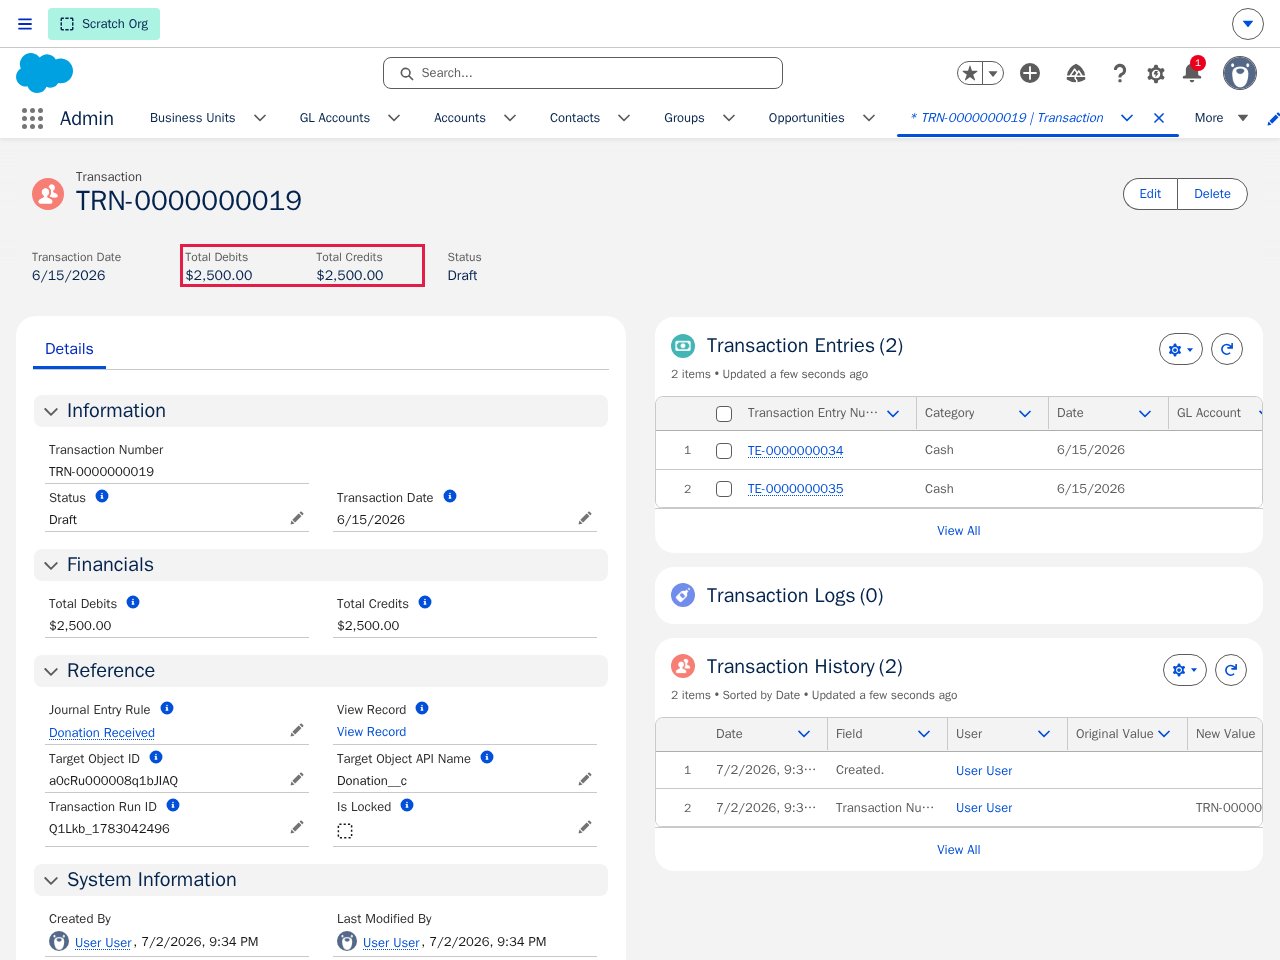
The generated Transaction: balanced totals, dated from the gift's Received Date
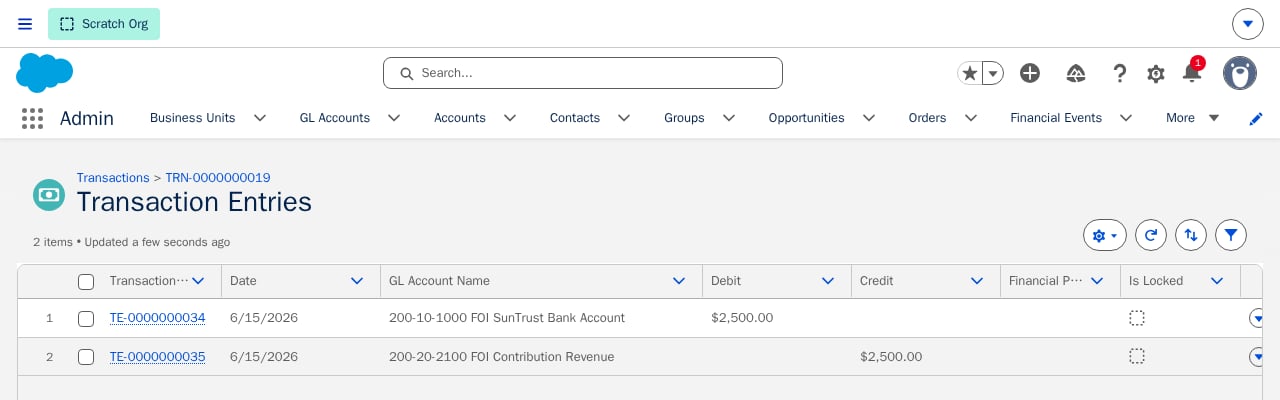
The full-width Transaction Entries list: the debit and its matching credit, line by line
fusionCore’s Standard Journal Entry Rules (Add-On)
Installing fusionCore’s Transaction Generator add-on and running its one-time setup script inserts the 21 Journal Entry Rules below. All of them target fusionCore’s Financial Event Lines, matching on the parent Financial Event’s type and status, and encode fusionCore’s standard accounting treatment — you don’t have to design this rule set yourself. You configure your GL Accounts on Commerce (A/R Account, Revenue Account, Deferred Account, Deposit Account, Write-Off Account, Due From/To Accounts), and each rule picks the right account automatically based on the Financial Event type.Assign the permission set
Insert the standard rules
new FS_StandardJournalEntryRecords().create().insertRecords();Confirm your GL Accounts are configured
Replace the Fetch and Lock buttons on the Financial Period page
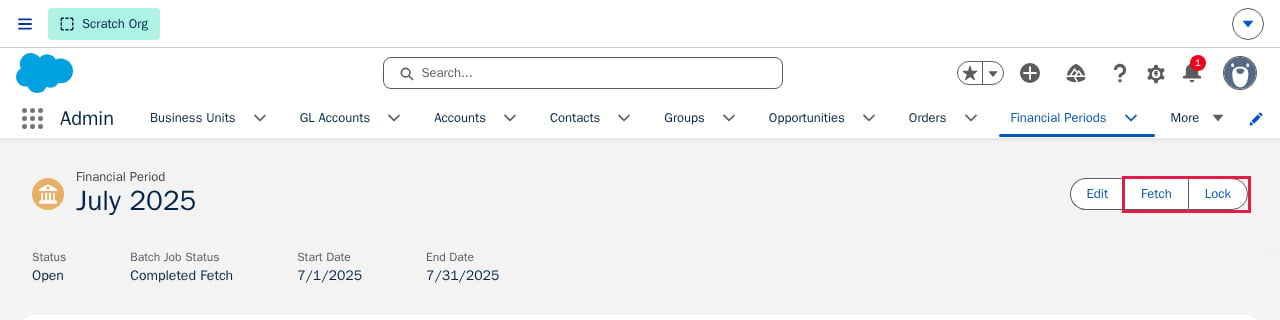
The Financial Period page still showing the base Fetch and Lock actions — this needs to change after installing the add-on
How the Add-On Traces a Transaction Entry Back to fusionCore
Every Transaction Entry the standard rules generate is automatically stamped with lookups back to the Commerce records that produced it —Financial Event, Financial Event Line, and GL Account — so accounting staff can trace a journal line back to the order or payment that caused it without leaving the Transaction Entry record.
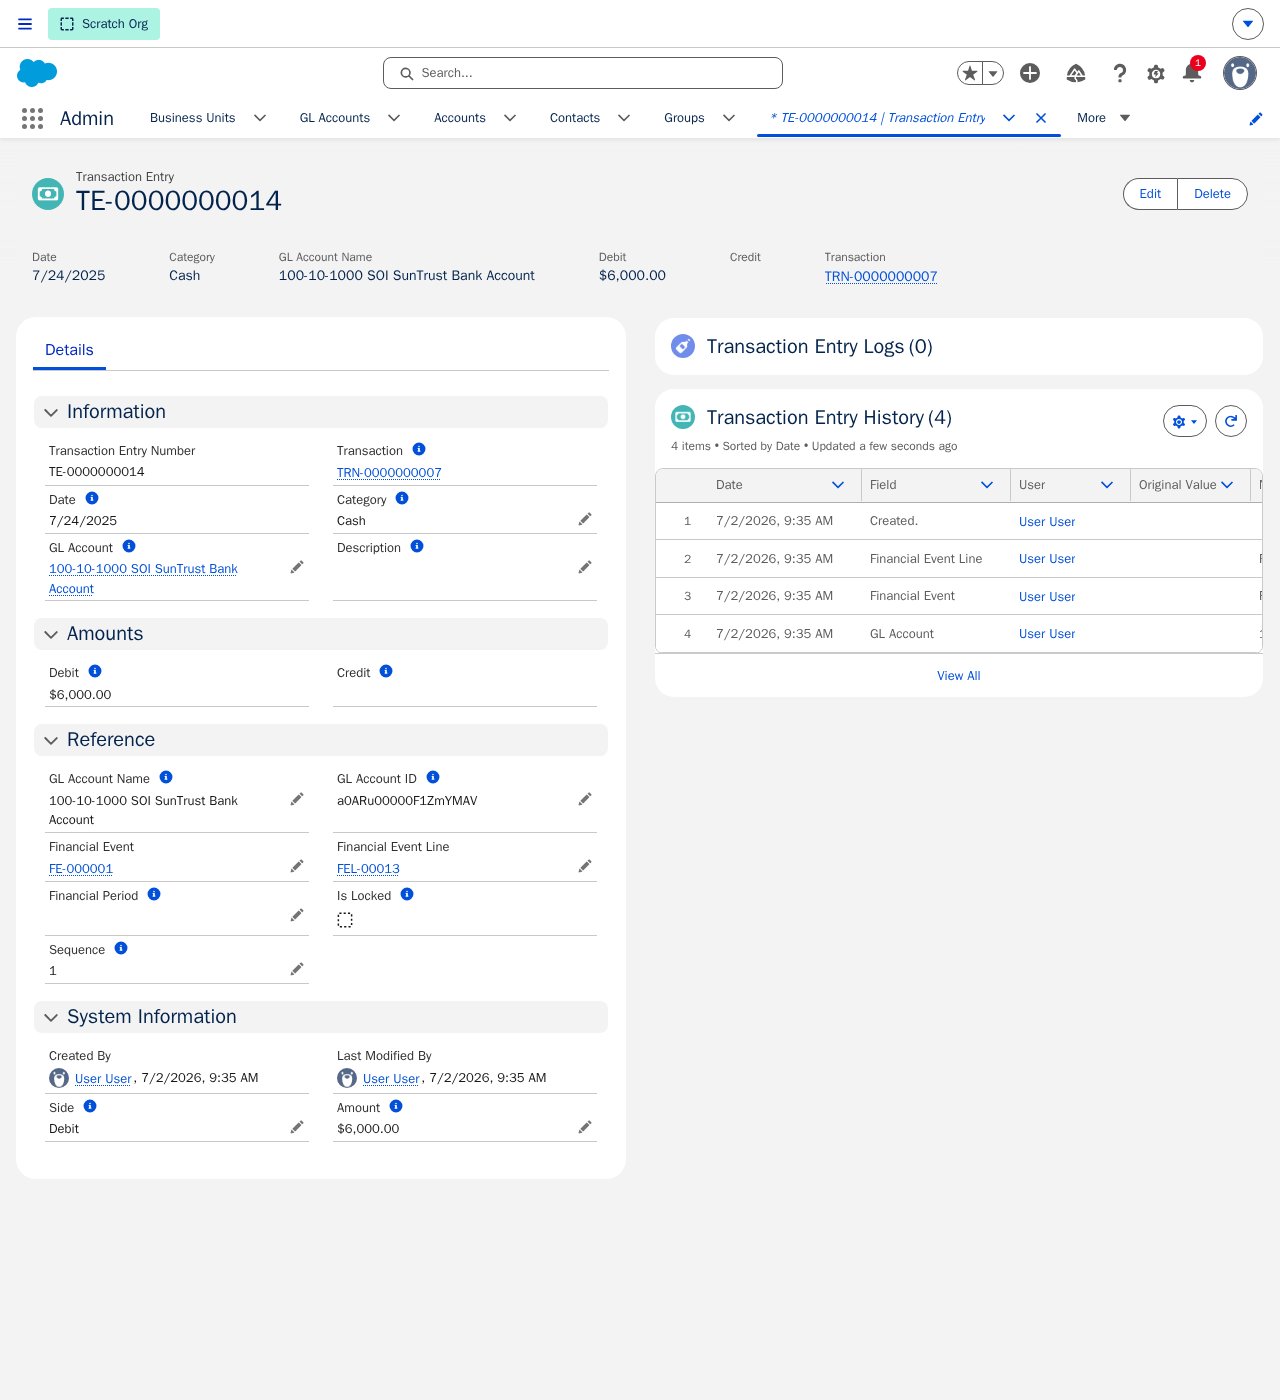
A generated Transaction Entry, showing the fusionCore add-on's reference fields
Financial Period Close Workflow
The add-on packages its own Fetch and Lock quick actions on the Financial Period, separate from the base Fetch and Lock actions already covered in Fetching Financial Event Lines and Locking Financial Periods. They carry the same button labels, which makes it easy to assume they’re the same action — they aren’t. Make sure the button swap from setup was actually done before relying on either action below.Fetch
Lock
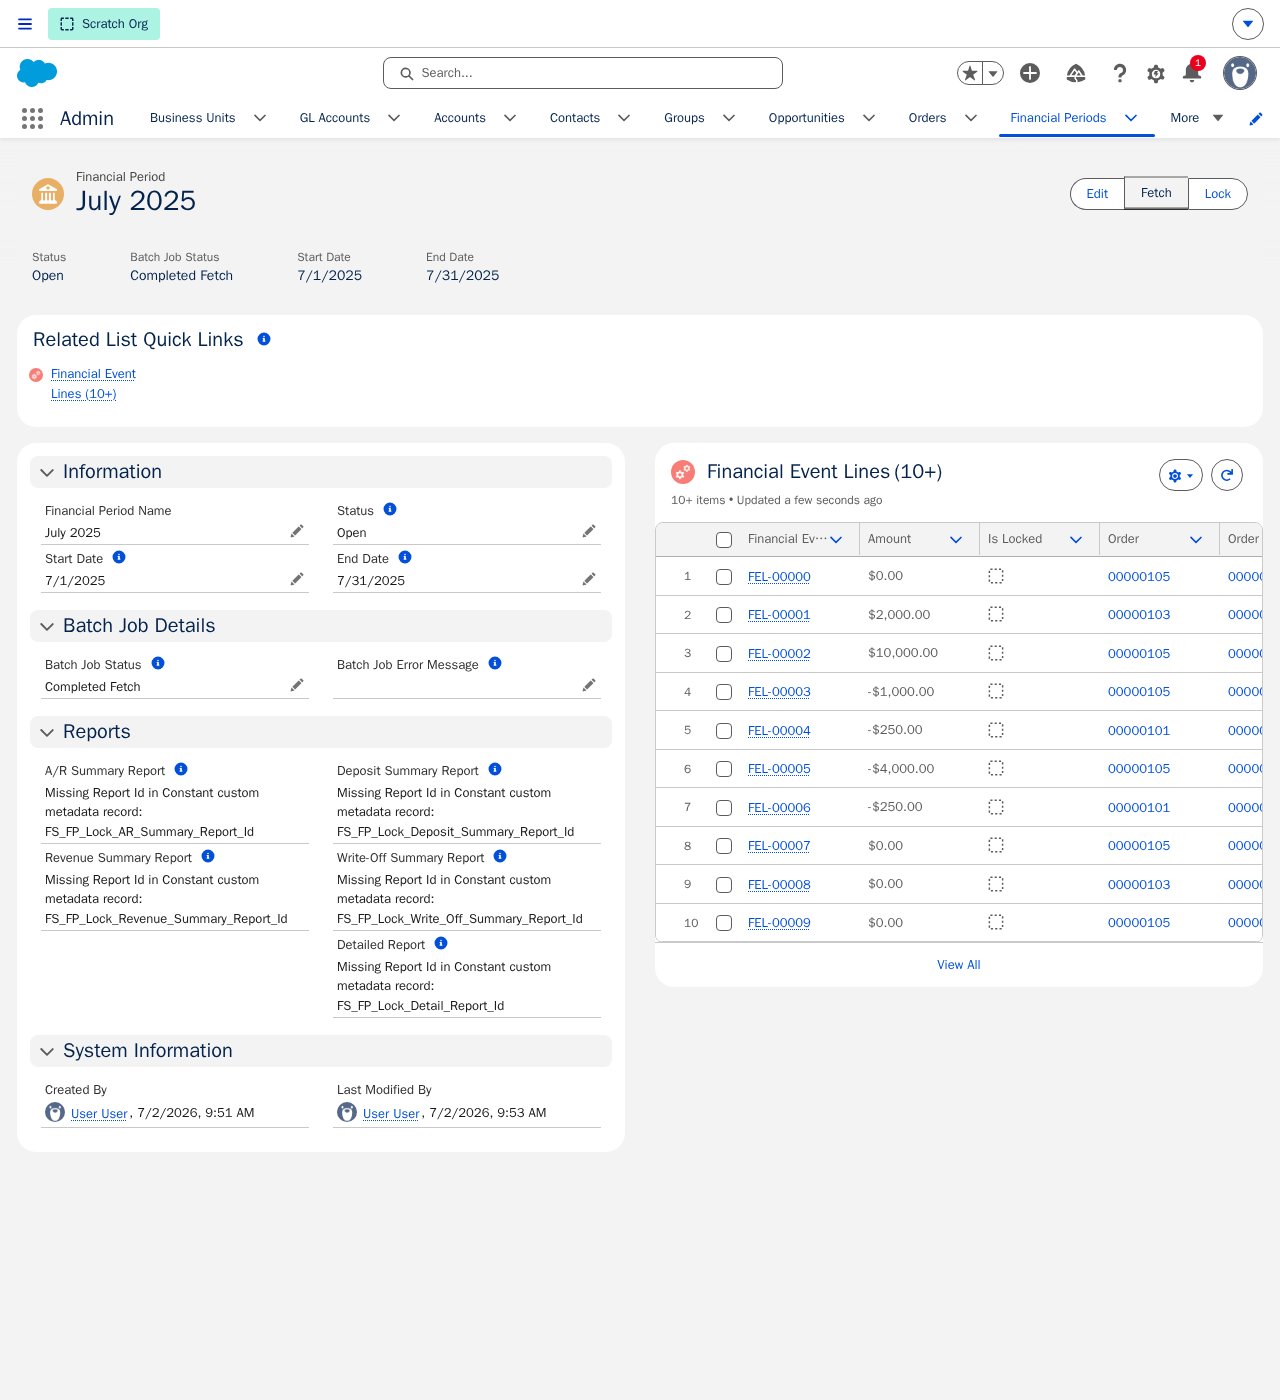
After Fetch: Transaction Entries for this period are now linked (shown here via the Financial Event Lines they were generated from)
Setting references on custom objects
For any new custom objects, you will want to create a Transaction Created date (Transaction_Created_Date) field so that the engine can track processed records that are defined in the Target Object field on the Journal Entry Rule
You will also want to ensure that you have corresponding fields on the Journal Entry Rule if you wish to have fields such as Deferral Period, Deferral Offset, Transaction Start Date, Transaction End Date and Default Amount fields included in your Journal Entry Rule for the new custom object
Limitations and Common Pitfalls
- Rules only match Succeeded Financial Events. Almost every one of the 21 standard rules requires the Financial Event to be in Succeeded status — events in any other status are ignored and never generate a transaction.
- The posted date comes from the Financial Event’s Succeeded date. If that date is wrong or blank, a generated transaction lands in the wrong Financial Period (or none), even if the transaction itself is correct.
- Deferred revenue only recognizes automatically if the Revenue Schedule field is set. A blank revenue schedule matches neither the specific-date nor the over-time recognition rule, so that deferred revenue is never automatically recognized.
- Write-offs don’t unwind remaining deferred revenue. The standard Write-Off rule only reverses the Accounts Receivable portion to a Bad Debt account — deferred revenue balances need a manual or custom entry.
- The Write-Off account should be set up as an expense account. Rule 19 debits it directly for the written-off amount. If your chart of accounts maps it to an asset or contra-asset account instead, write-offs will misstate your balance sheet rather than your income statement.
- Locking is one-way. Once a Financial Period is locked, its transactions and entries can’t be edited or deleted, and there’s no built-in “unlock” action.
- You can only close one Financial Period at a time. Trying to close more than one in the same bulk update or data load is blocked.
- Locking checks are strict — but only if the add-on’s Lock action is actually on the page. If any Financial Event in the period’s range has zero Transaction Entries, or any entry isn’t linked, isn’t Succeeded, or doesn’t balance, the add-on’s Lock action fails with an error naming the specific problem. The base org’s original Lock action has no awareness of any of this and will lock the period anyway — see Financial Period Close Workflow above.
- A failed batch scope isn’t silently dropped. If part of a nightly run fails, the base engine automatically retries that portion at a smaller batch size to isolate the problem record, rather than failing the entire night’s run.
- The four report links on a Financial Period need one-time setup. The A/R, Deposit, Write-Off, and Detail Summary Report fields on a Financial Period each read a Salesforce Report Id from a
Constantcustom metadata record. Until those records are populated with real Report Ids, the fields show “Missing Report Id in Constant custom metadata record” instead of a link.