

- Checkout — placing orders through an Experience Cloud portal
- Refunds — returning payments to an individual
- Purchase tracking — recording what an individual has bought
- Credit application — applying an individual’s credit or wallet balance
- Order and opportunity creation — generating orders and opportunities for an individual
Before You Start
- You need an administrator login with permission to change setup (typically the System Administrator profile).
- Know which page layout your org uses for Accounts. In a fusionCore org the Account layout is usually FC Account Layout.
- Know which profiles need access to Person Accounts (for example System Administrator, Standard User, or a QA tester profile).
- Know which users need to see fusionCore business data on Person Accounts, so you can assign permission sets later.
- Have access to the Membership app and the Accounts tab for the final list-view step.
Configure the Person Account Record Type
Before you enable Person Accounts, create a business Account record type. This gives organization-style Accounts their own record type, which keeps them separate from the Person Account record type that Salesforce adds automatically when the feature is enabled.Open the Account object
Object Manager in the Quick Find box and open Object Manager, then click Account.Start a new record type
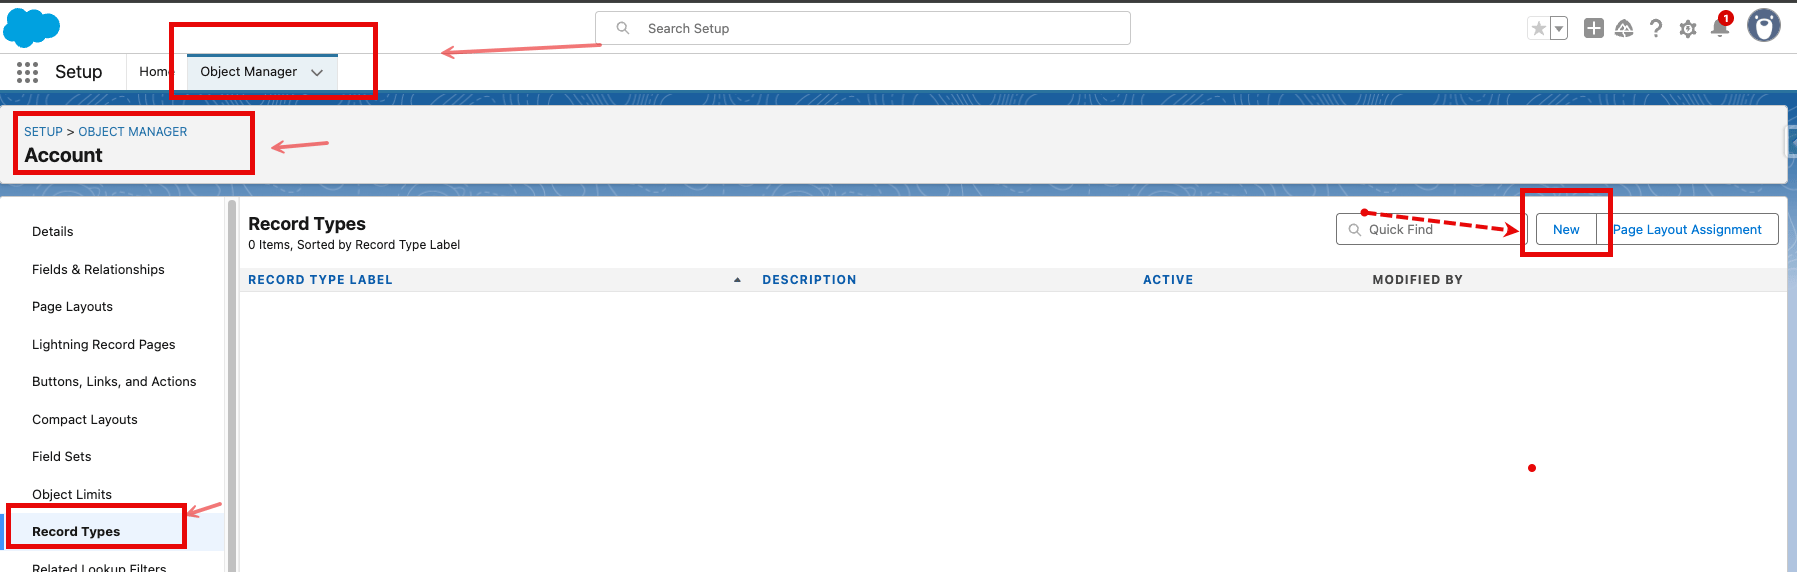
The Record Types page on the Account object, with the New button.
Fill in the record type details
- Existing Record Type: select Master (if it is not already chosen).
- Record Type Label: enter a name that fits your organization’s naming convention, such as Business Account or Organization Account.
- Record Type Name: this auto-fills from the label.
- Description: optional, for example Record type used for organization Accounts.
- Active: make sure this checkbox is checked.
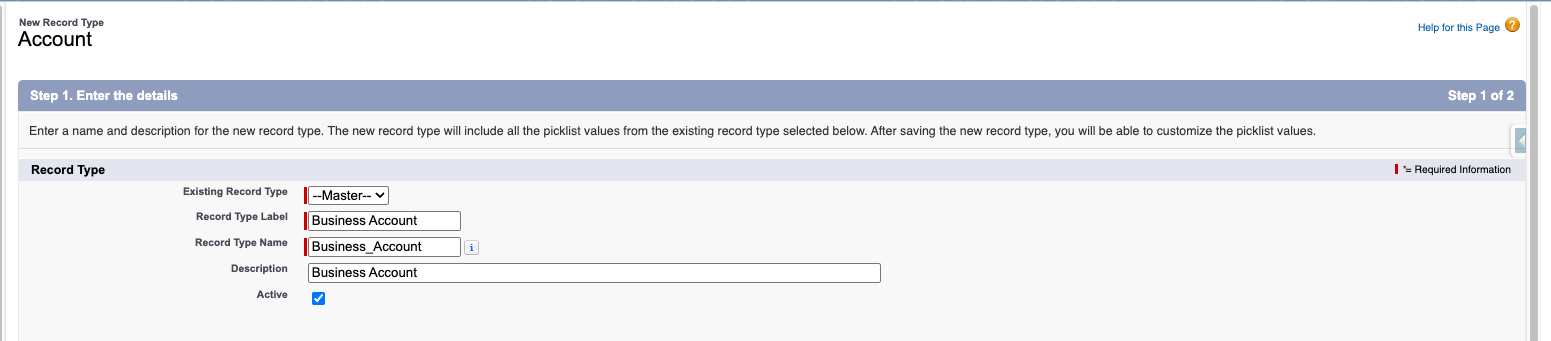
The new record type form with the label and Active checkbox.
Make the record type available to profiles
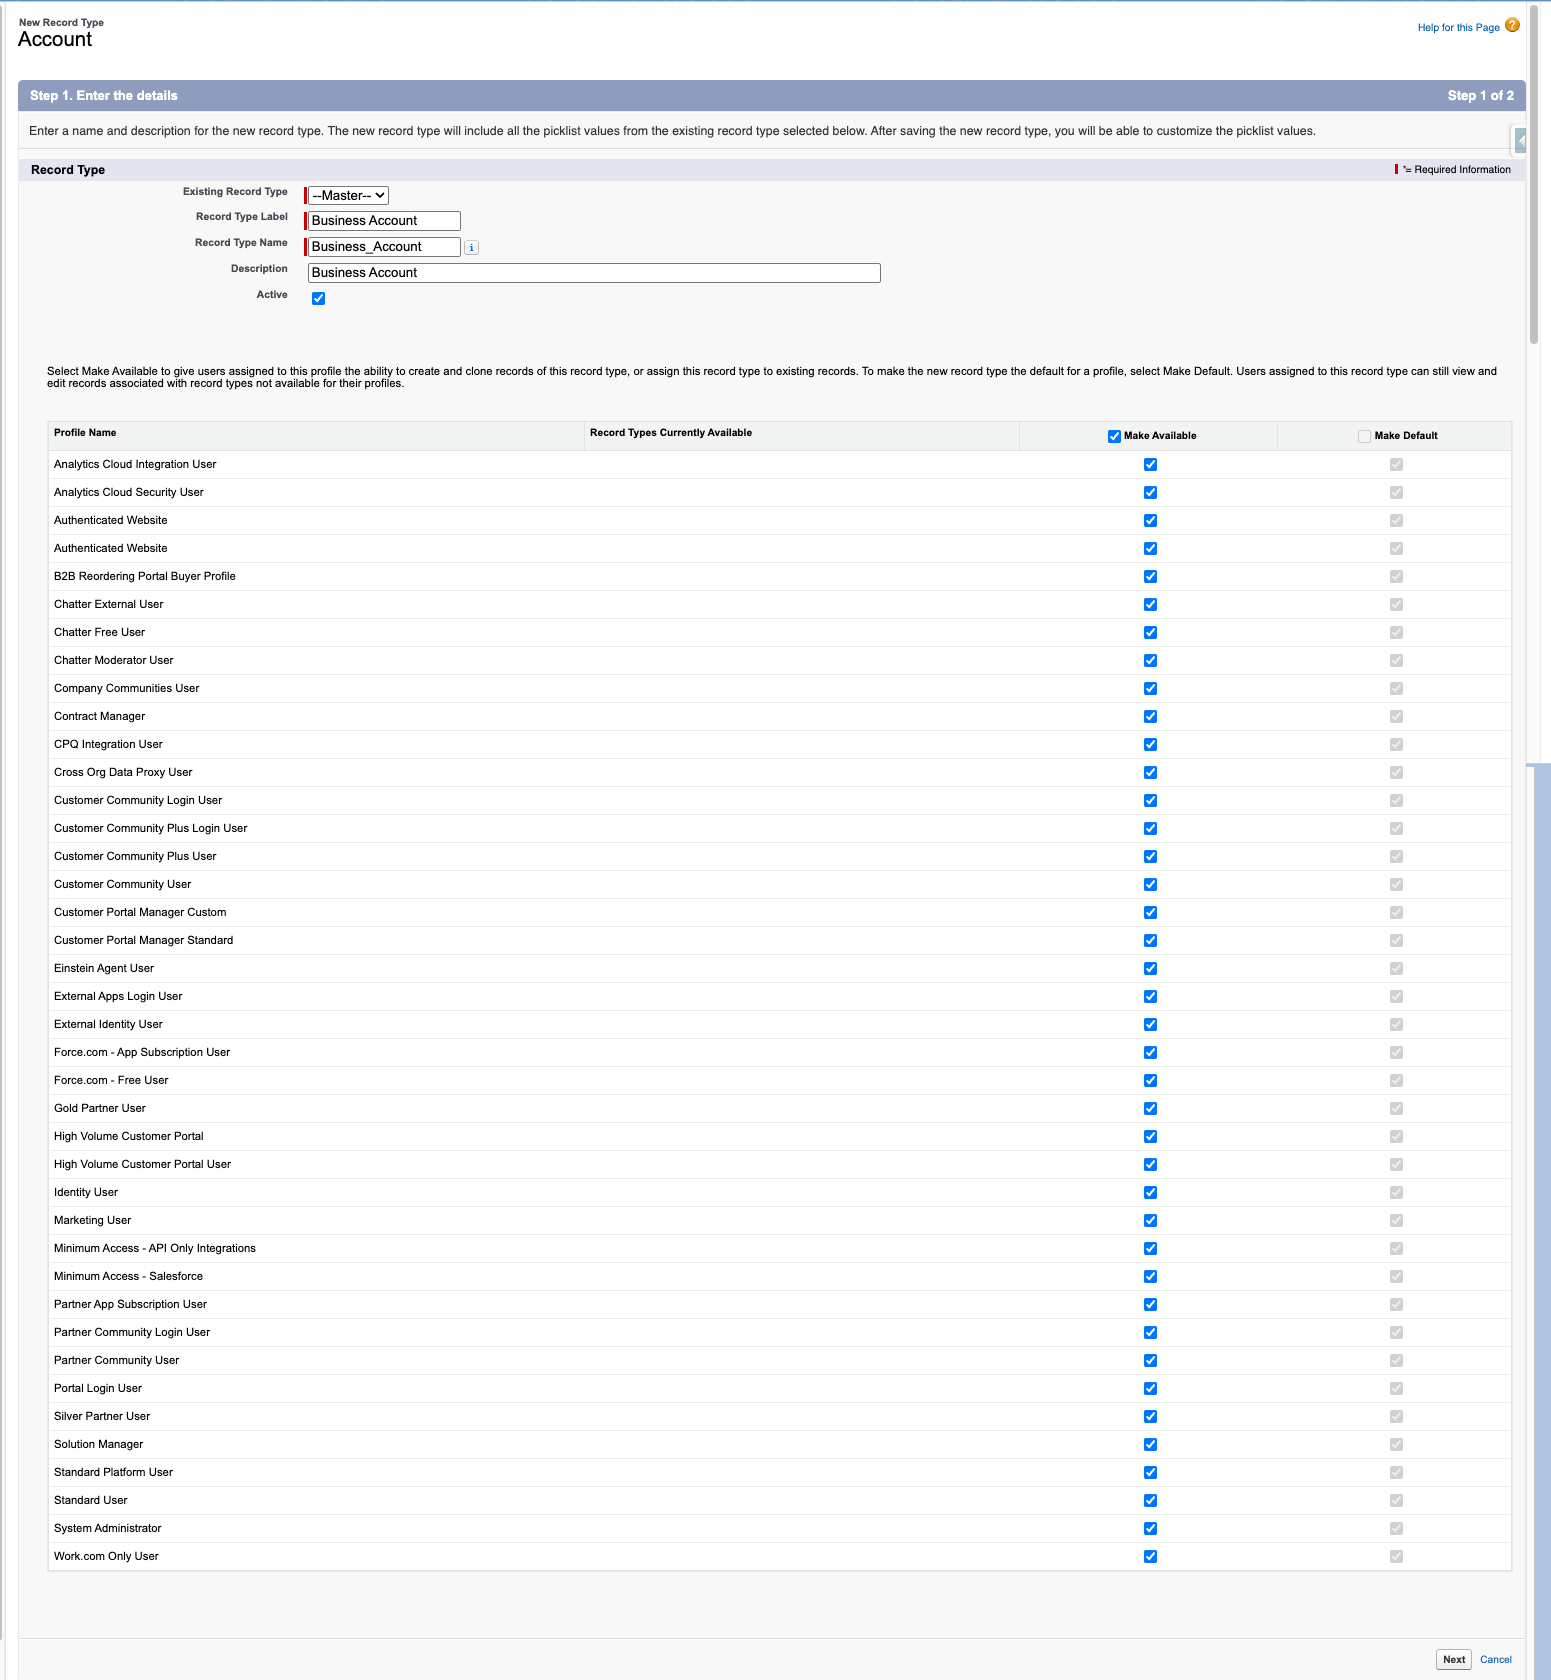
Making the record type available to profiles and assigning a page layout.
Save
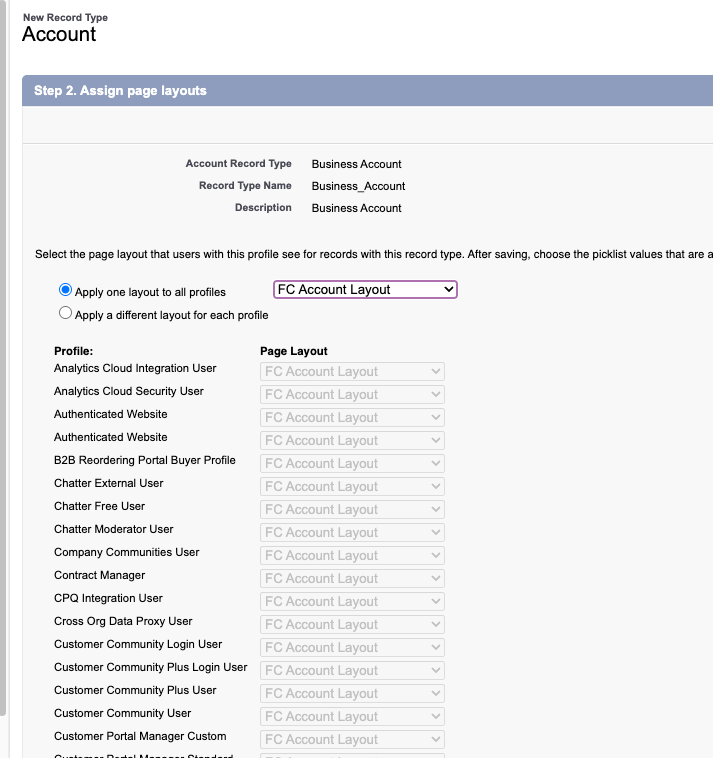
The page layout assignment screen before saving.
Enable Person Accounts
Before you can create Person Accounts, turn the feature on in Setup. At least one profile must have a record type assigned for the Account object before you can enable the feature. The readiness check in the steps below confirms this for you.Open Person Accounts setup
Person in the Quick Find box, then click Person Accounts.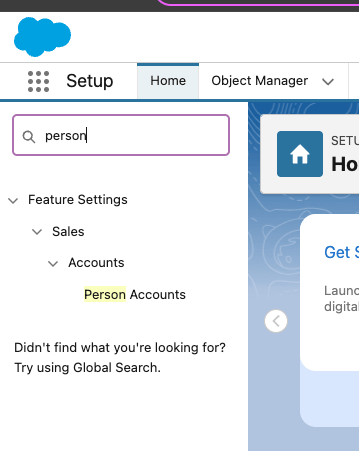
The Person Accounts setup page in Quick Find.
Run the readiness check
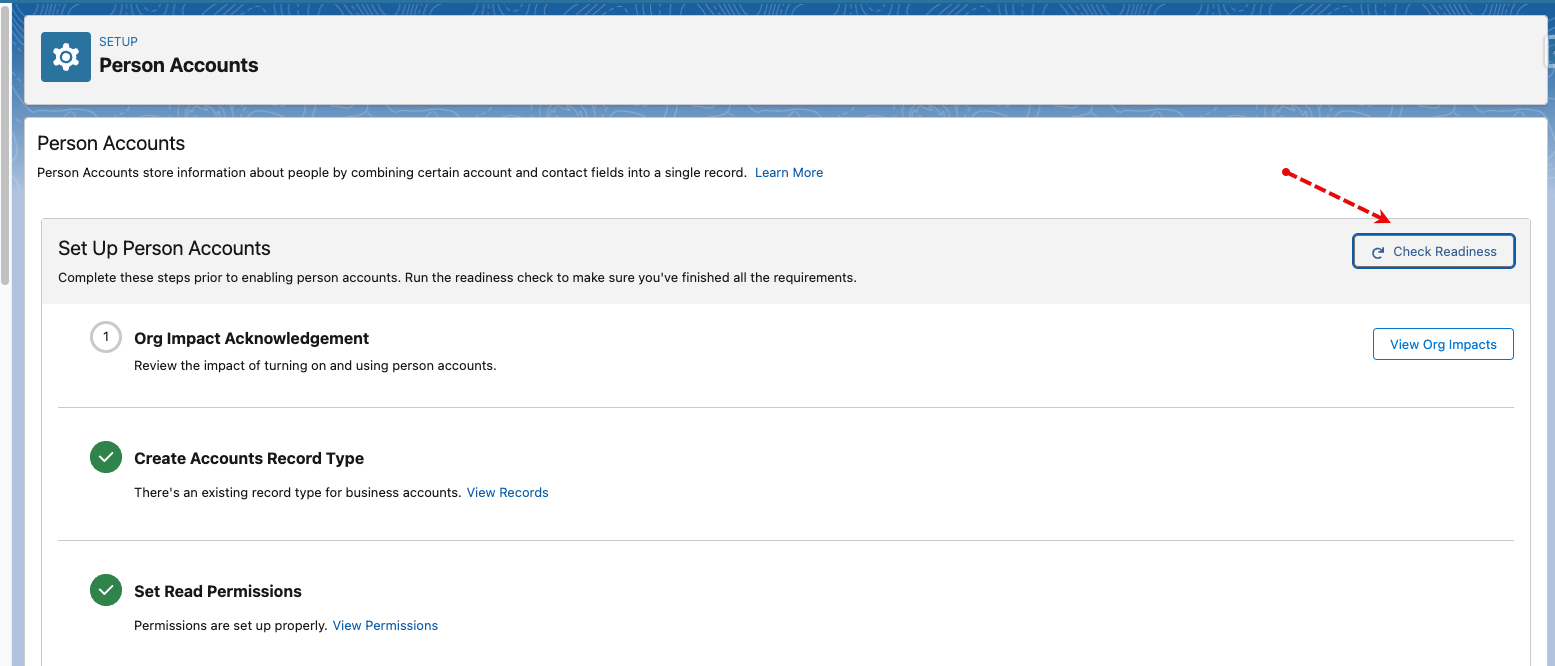
The Check Readiness button on the Person Accounts setup page.
Review the org impacts
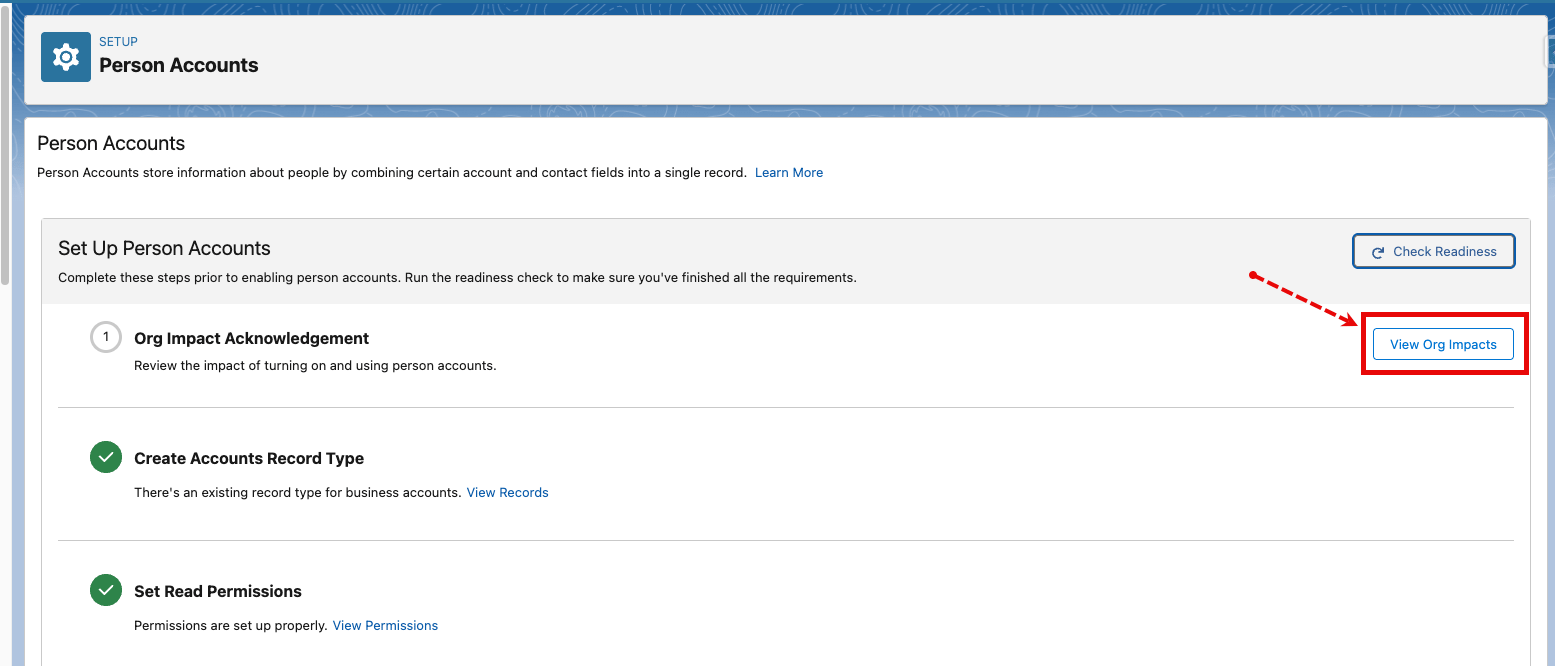
The View Org Impacts summary listing the changes enabling Person Accounts will make.
Acknowledge and continue
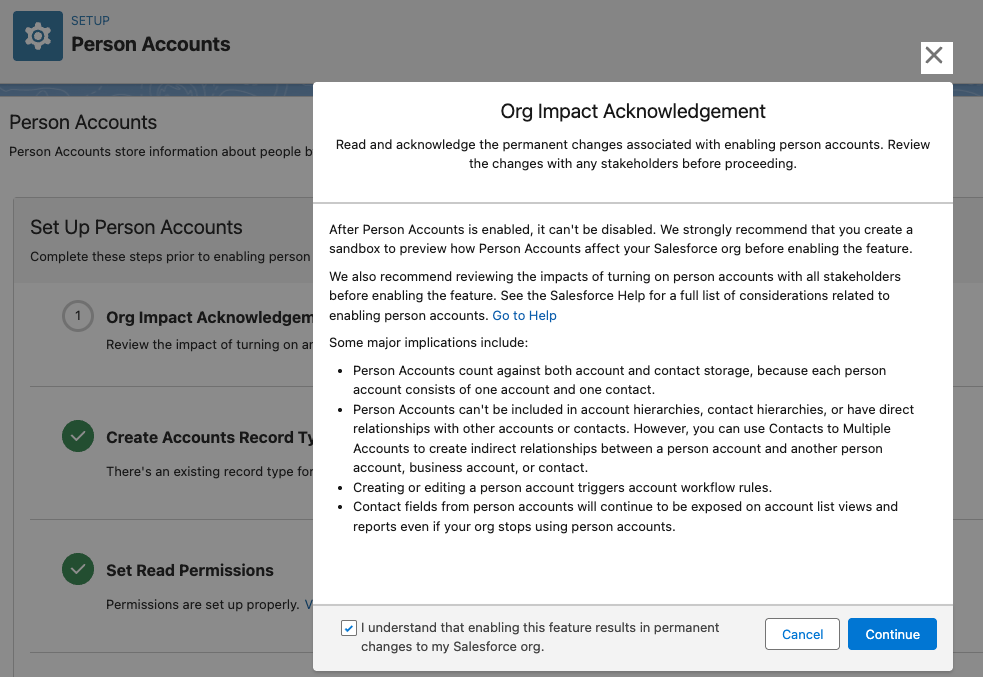
The acknowledgment checkbox and Continue button.
Enable the feature
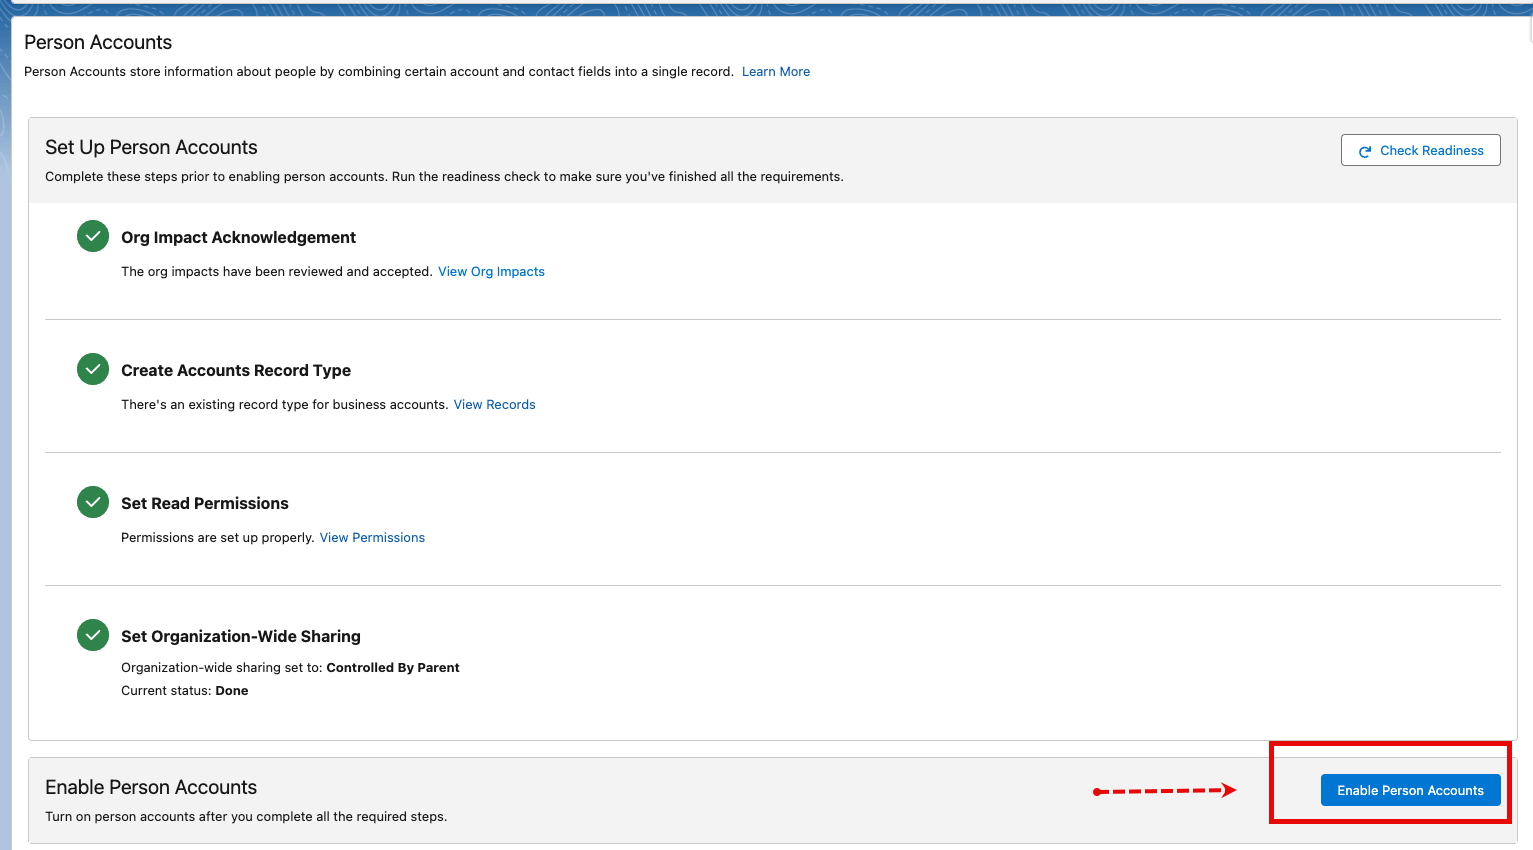
The Enable Person Accounts confirmation popup.
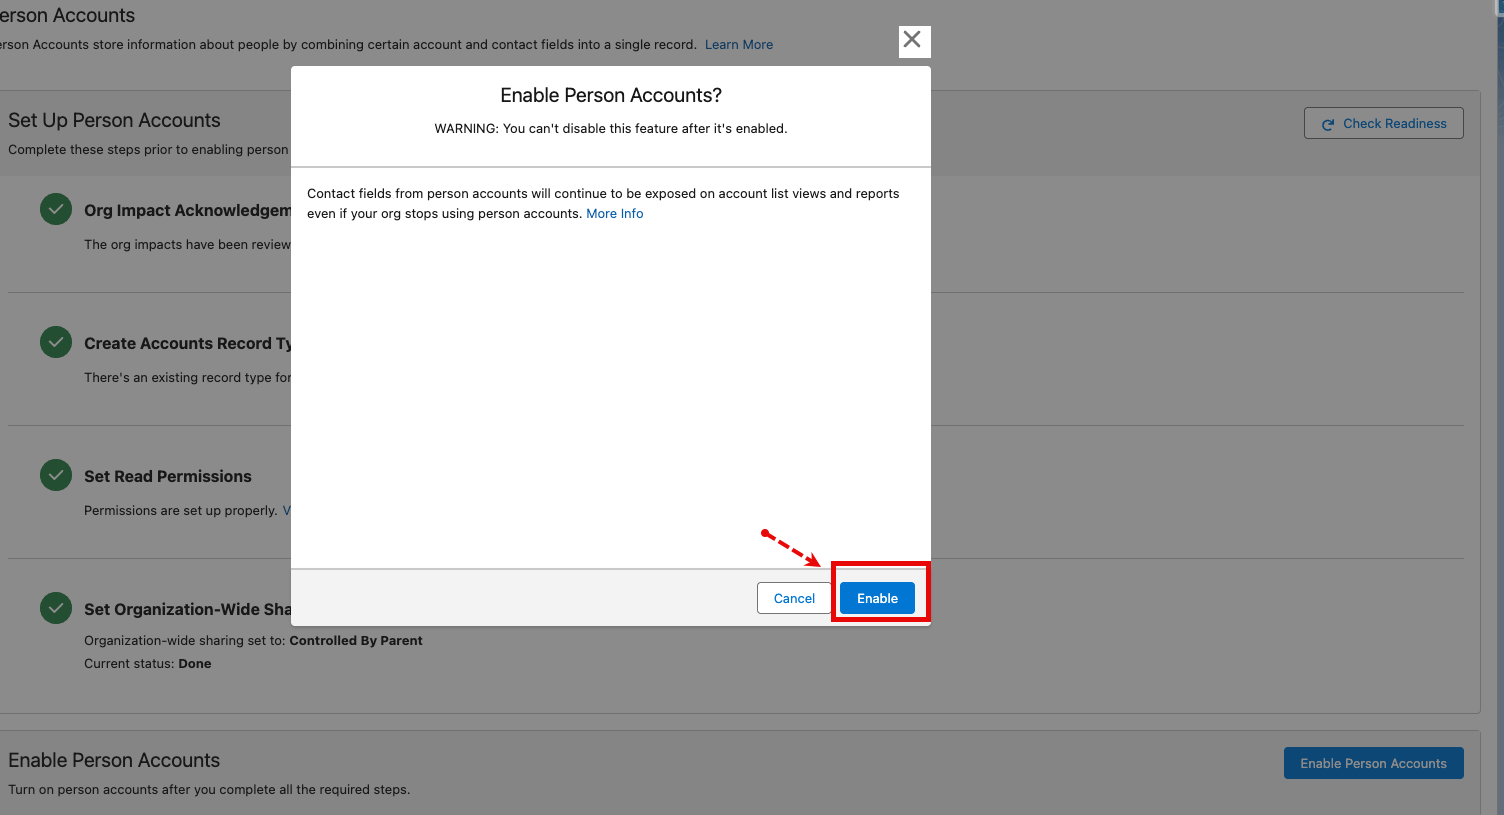
The final Enable confirmation prompt.
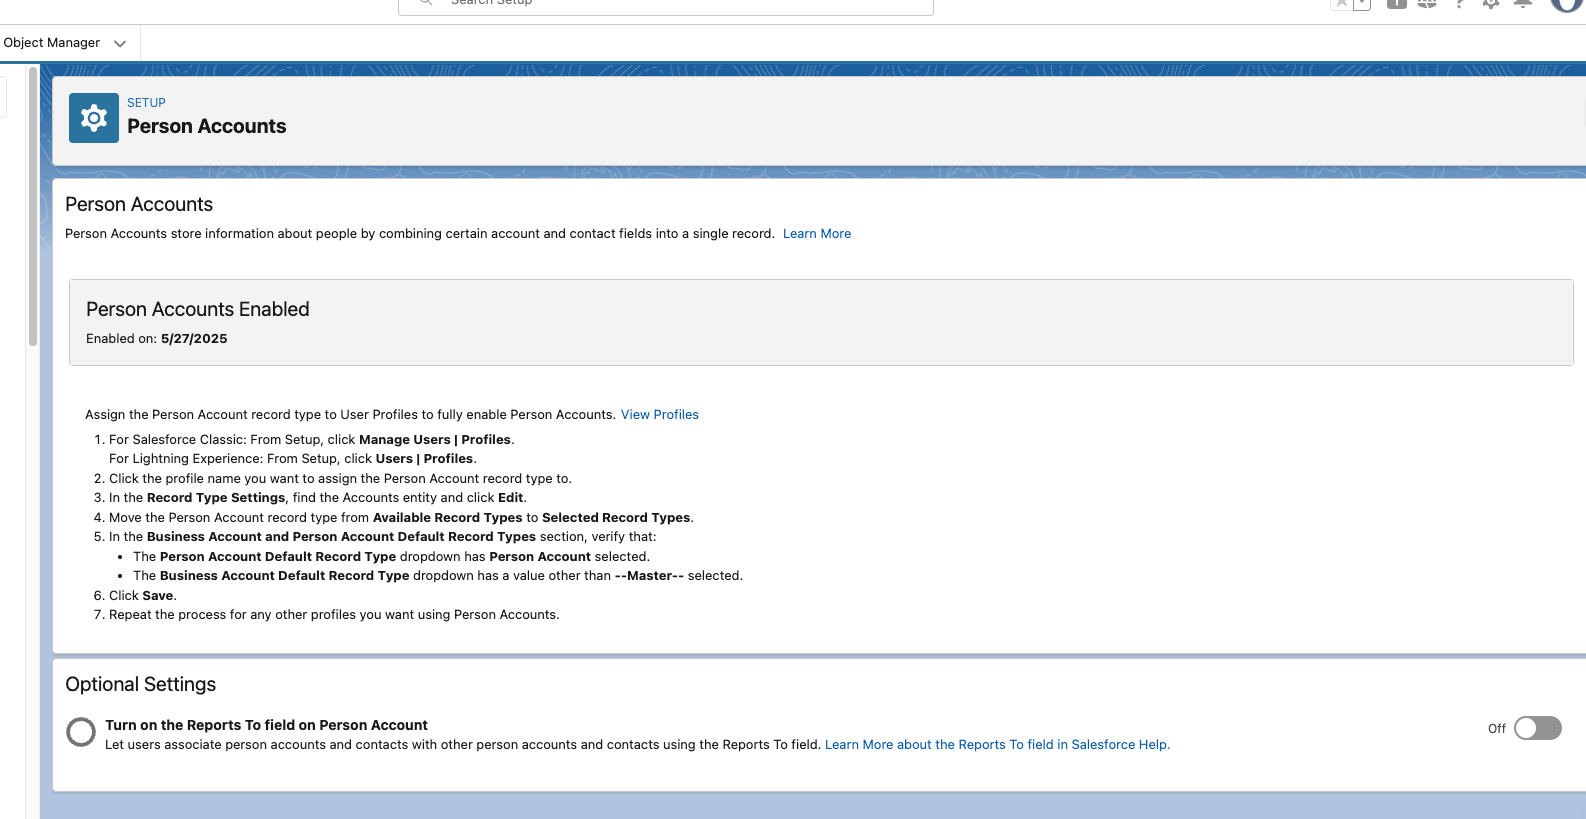
The Person Accounts setup page confirming the feature is enabled.
Assign Person Accounts to Profiles
After you enable Person Accounts, make the Person Account record type available on the Account object for each profile whose users need to create or work with Person Accounts. Until you do this, those users cannot select Person Account when they create an Account.Open the profile
Profiles in the Quick Find box, click Profiles, then select the profile you want to update (for example System Administrator).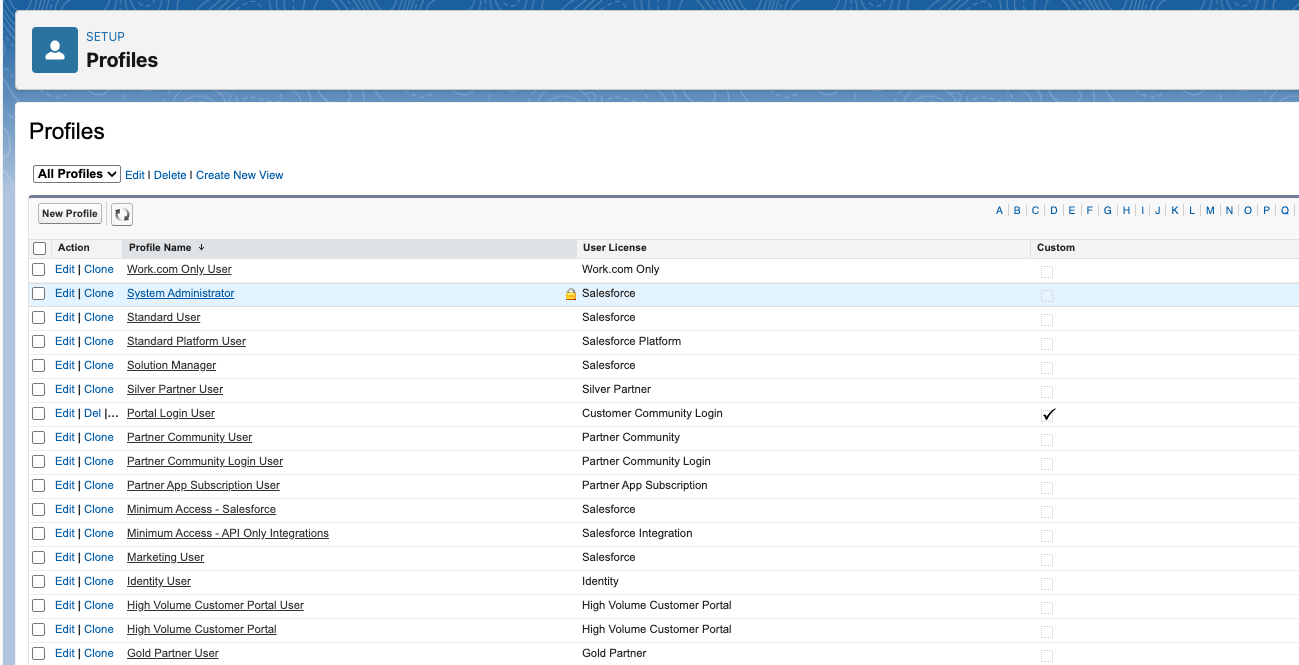
The Profiles list in Setup.
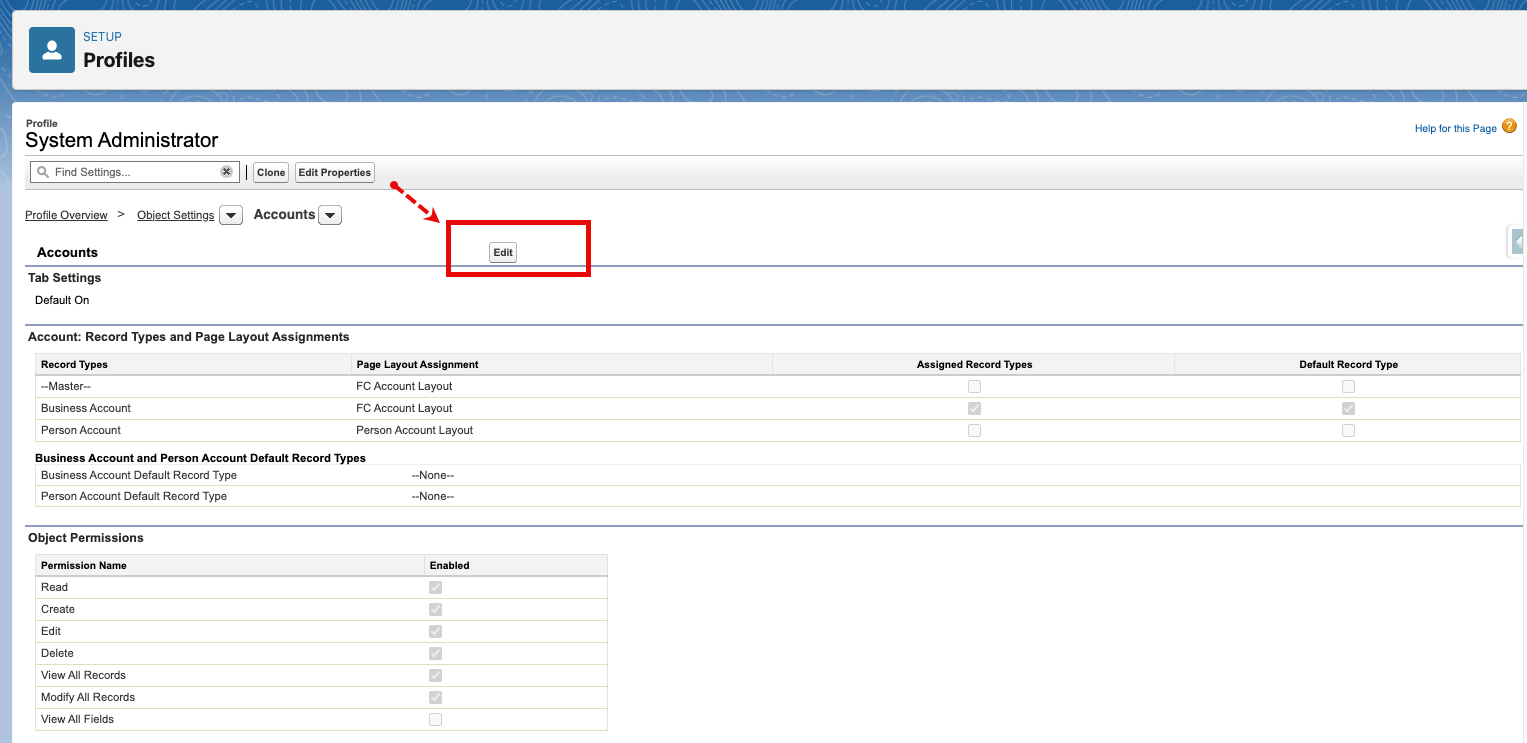
Edit the Account record type settings
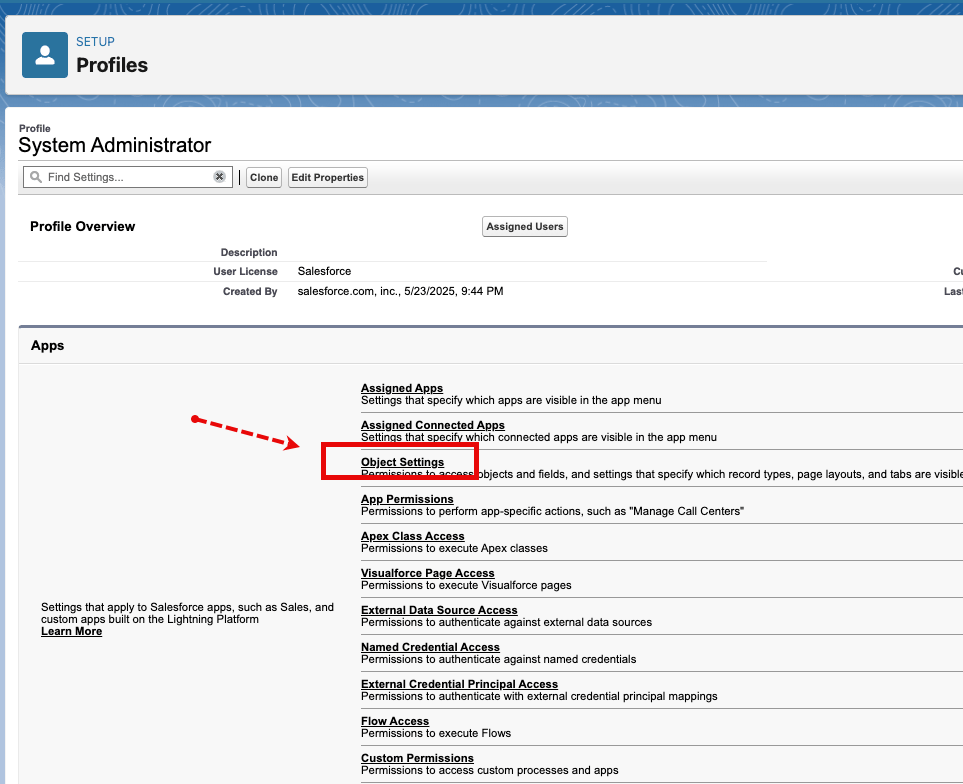
The Record Type Settings section with the Edit link for Accounts.
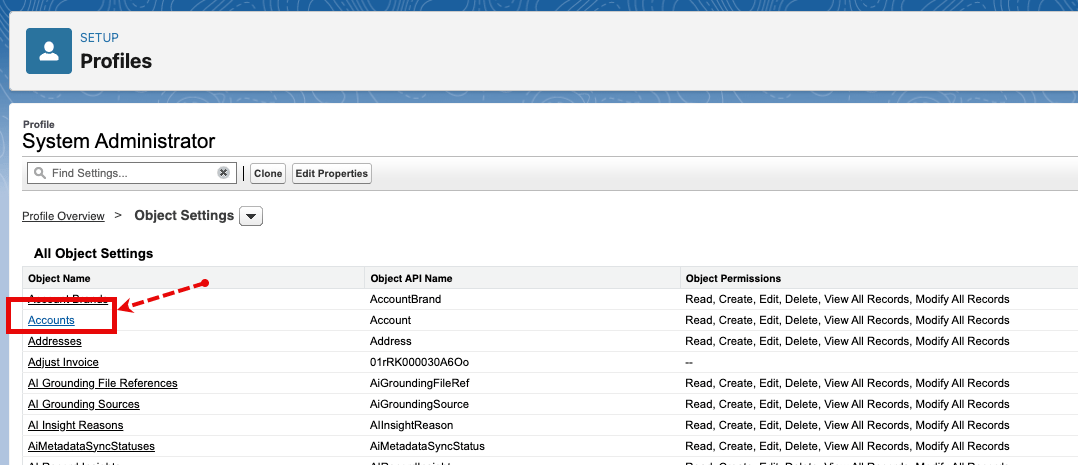
The Account record type edit screen for the profile.
Moving record types into the Selected Record Types list.
Make Person Account available
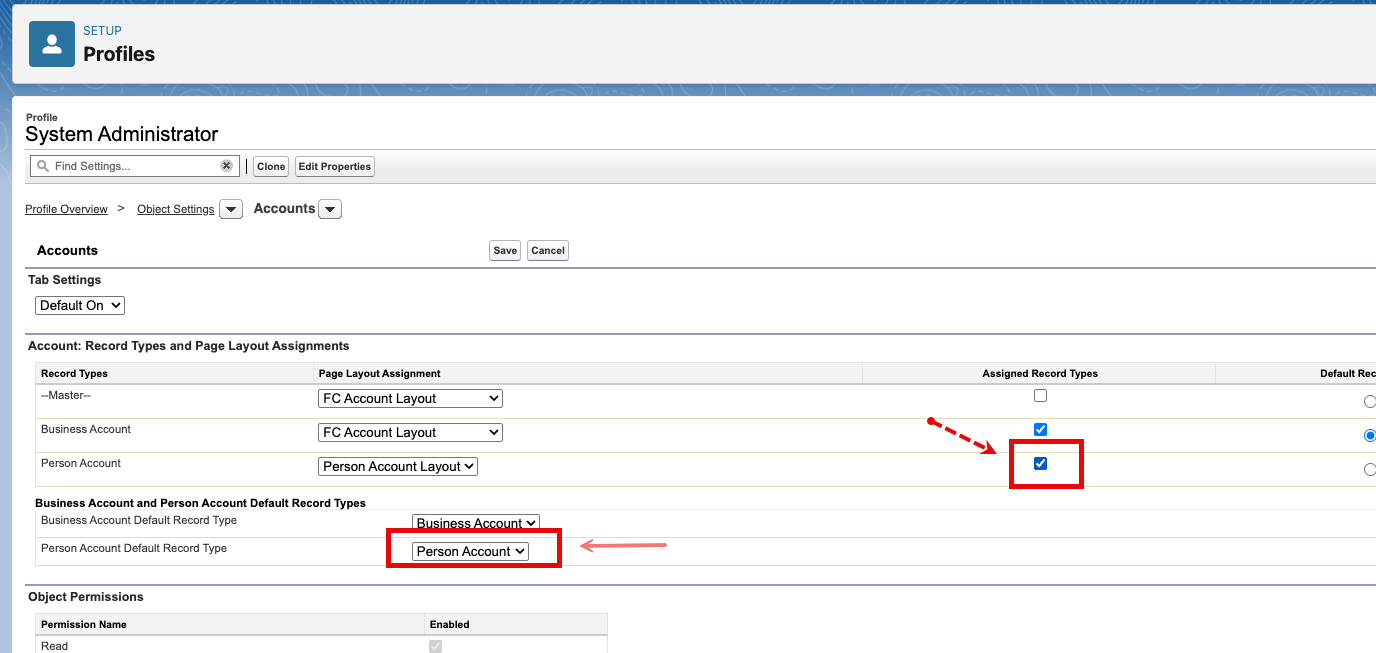
Person Account selected and set as the default record type.
Save
Update Layouts for Person Accounts
After you enable Person Accounts, update the Person Account layout so the fusionCore fields and actions you need are visible. This step has two parts:- Part A adds fusionCore fields and actions to the Person Account page layout.
- Part B creates a compact layout for Person Accounts and sets it as the default.
Part A: Update the Person Account Page Layout
Open Object Manager
Find the Person Account object
Person Account, then click Person Account.Open the layout
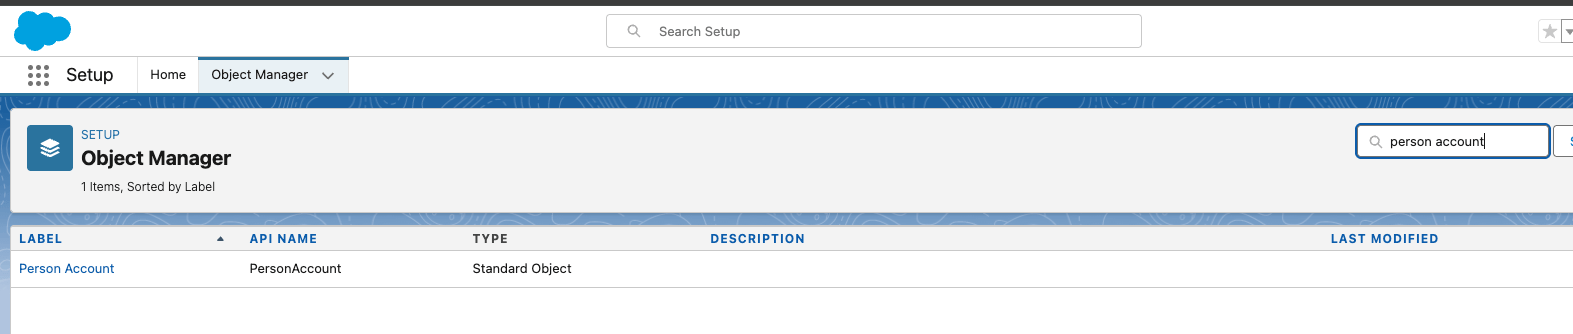
The Person Account object's Page Layouts list in Object Manager.
Add fields
- Total Available Individual Credit
- Title
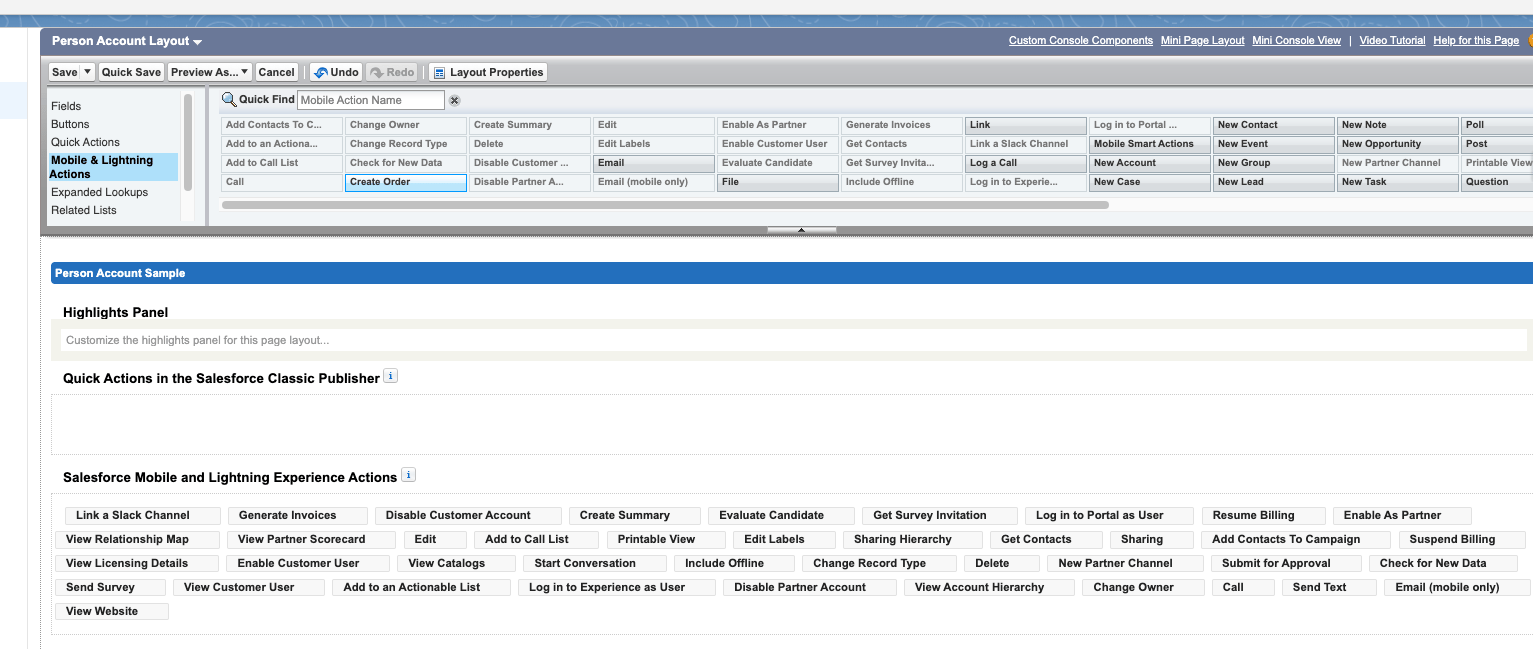
The Person Account layout editor with the added fields in place.
Add the fusionCore actions
- Create Order
- Enable Customer User
- Log in as Experience User
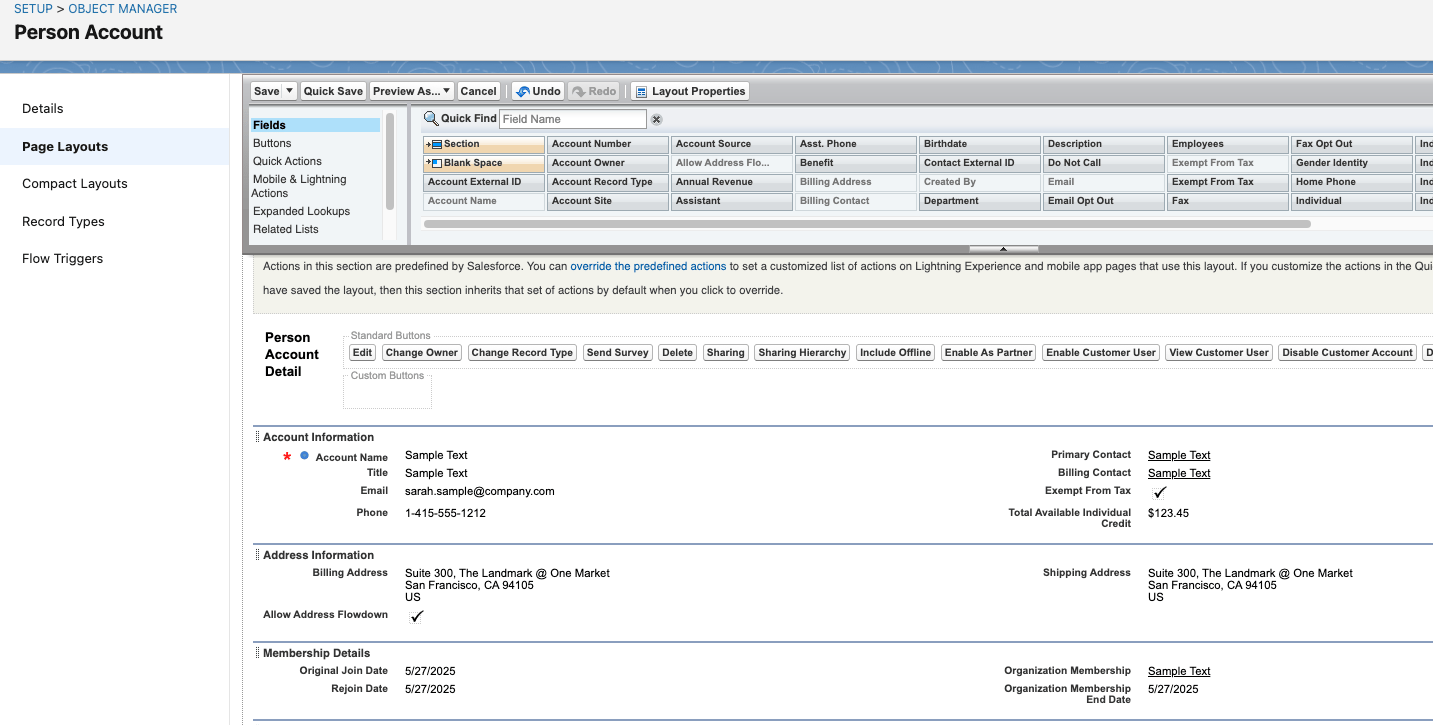
The Mobile and Lightning Actions section with the fusionCore actions added.
Save the layout
Part B: Create and Assign a Compact Layout
Creating a compact layout for Person Accounts keeps the most useful fields in view at the top of the record.Open Compact Layouts
Set the label and fields
Person Account Compact Layout, then under Fields to display add:- Account Name
- Title
- Phone
- Billing Address
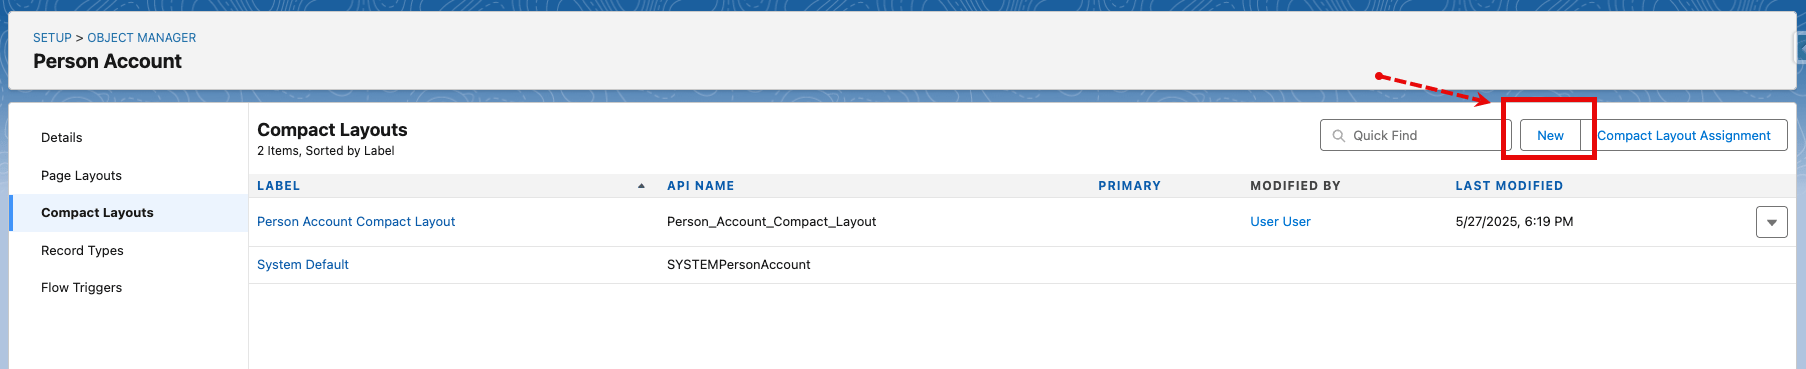
The New Compact Layout form with the label and selected fields.
Save the compact layout
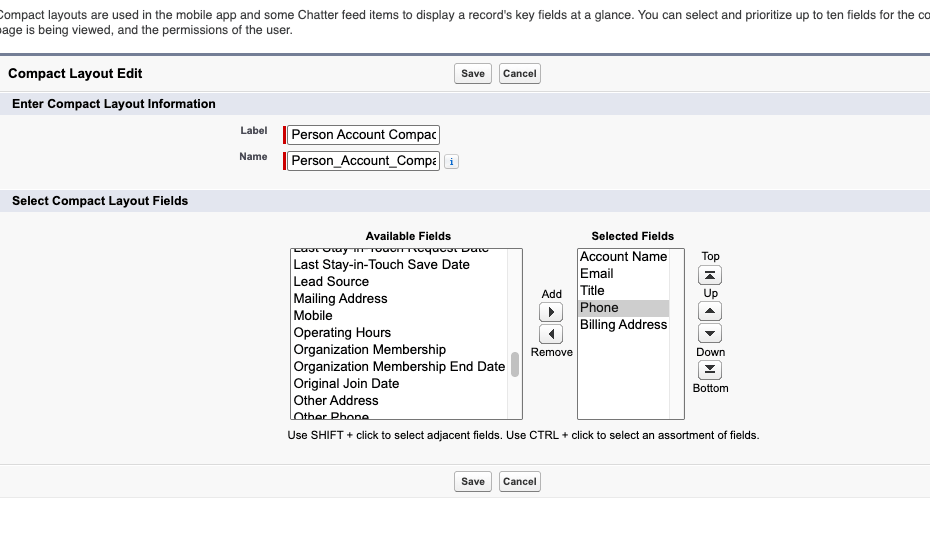
The saved Person Account Compact Layout.
Assign the compact layout
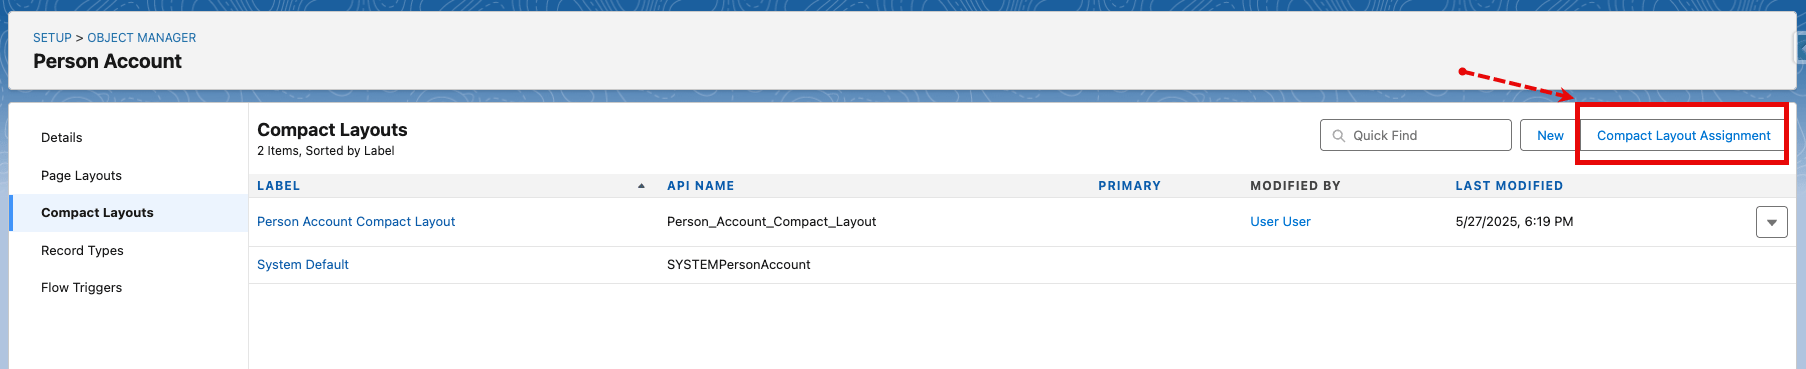
The Compact Layout Assignment screen.
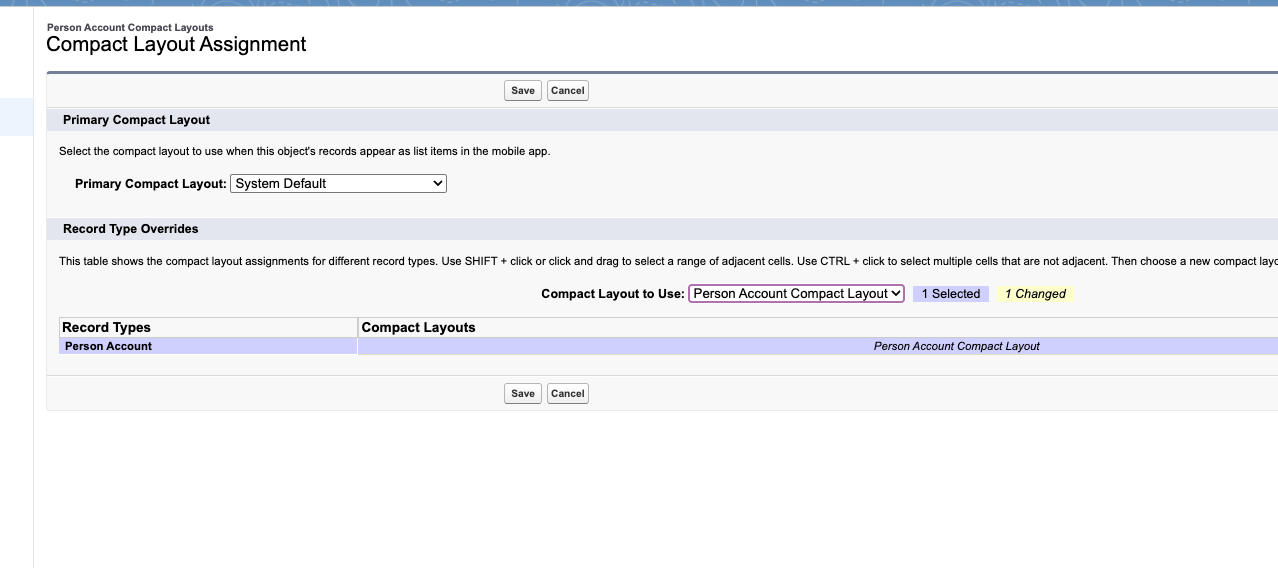
Person Account Compact Layout set as the primary compact layout.
Assign Person Account Fields to Object Page Layouts
Several fusionCore objects — such as Credit and Order — can belong to either an organization or an individual, so they need a field that shows the right customer name in either case. fusionCore ships two formula fields that handle this for you:FS_Customer__c— shows the customer’s name as a clickable link.FS_Customer_Name__c— shows the customer’s name as plain text.
FS_ versions of these fields were not designed for Person Accounts and do not resolve the individual’s name correctly. On the page layouts below, add the FS_ field and remove the older version it replaces.
Open Object Manager
Object Manager and open it.Open each object's page layout
Add the FS_ field
Remove the older field
FS_ version of the same field from the layout, then click Save.FS_ version of the customer field. Those fields predate Person Account support and do not resolve the individual’s name for Person Accounts.Assign Permission Sets for Person Account Access
fusionCore ships two permission sets that grant access to the fusionCore business-data fields used by Person Accounts:FS Person Account - Manage Business Data(API nameFS_Person_Account_Manage_Business_Data)FS Person Account - View Business Data(API nameFS_Person_Account_View_Business_Data)
FS_Customer__c and FS_Customer_Name__c) on the Credit, Purchase Activity, Opportunity Line Item, Order, and Order Item records. With this access, those fields resolve correctly for Person Accounts. Assign the permission set (or sets) to any user who needs to see fusionCore business data on Person Accounts.
Open Permission Sets in Setup
Open the permission set
FS Person Account - Manage Business Data or FS Person Account - View Business Data.Open Manage Assignments
Add the users
Assign
Configure a List View for Person Accounts
By default the Accounts tab mixes organizations and individuals, so this final step creates a list view that shows only Person Accounts, with the most useful fields visible.Open the Accounts Tab
Open the Membership app
Open the Accounts tab
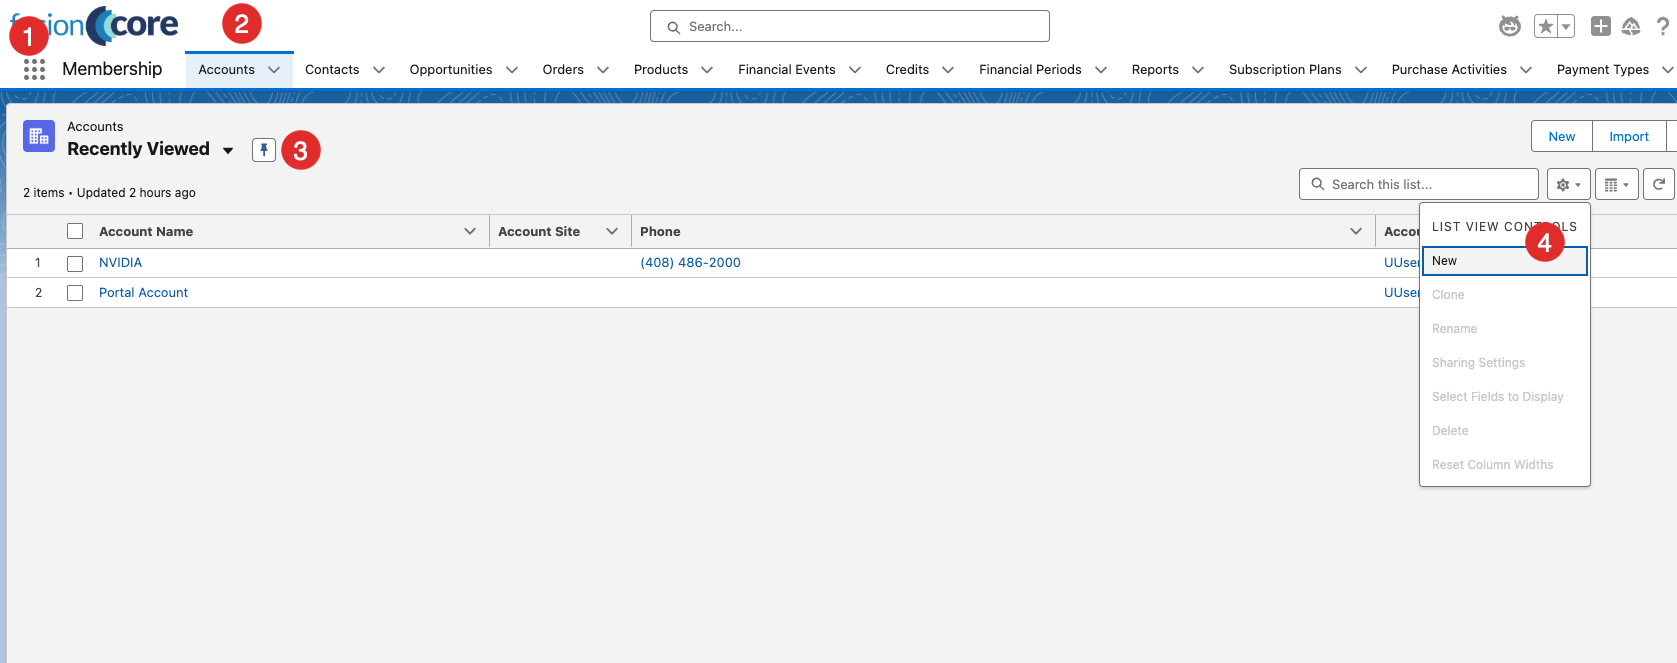
The Accounts tab in the Membership app.
Create the List View
Open the list view controls
Name the list view
Person Accounts. The List API Name fills in automatically.Set who can see it
Save
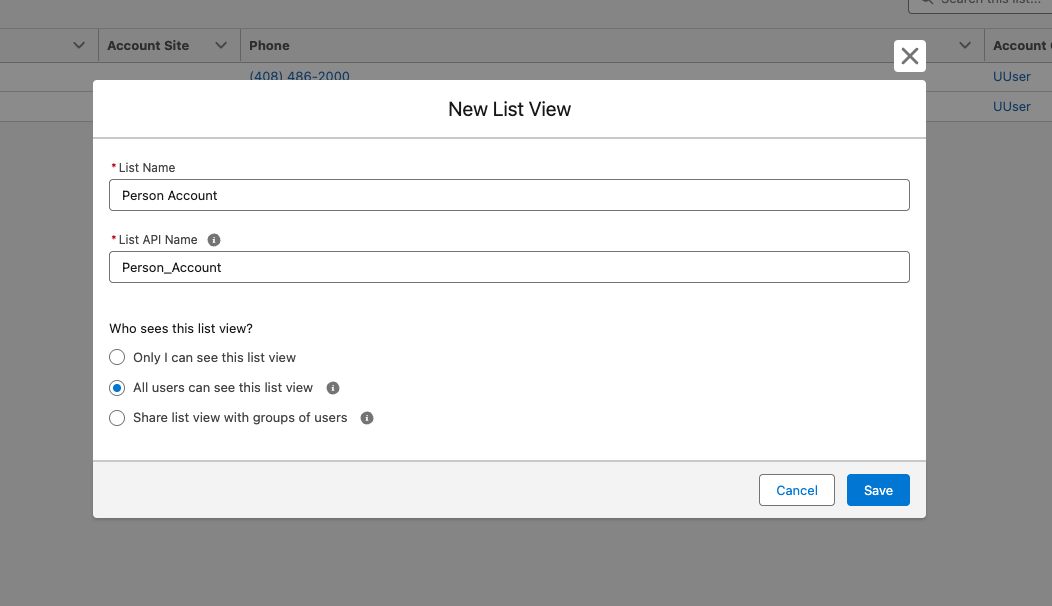
The New List View dialog with a name and visibility selected.
Choose the Fields to Display
Open Fields to Display
Add the fields
- Account Name
- Phone
- Billing City
- Billing State/Province
- Customer Type
Save
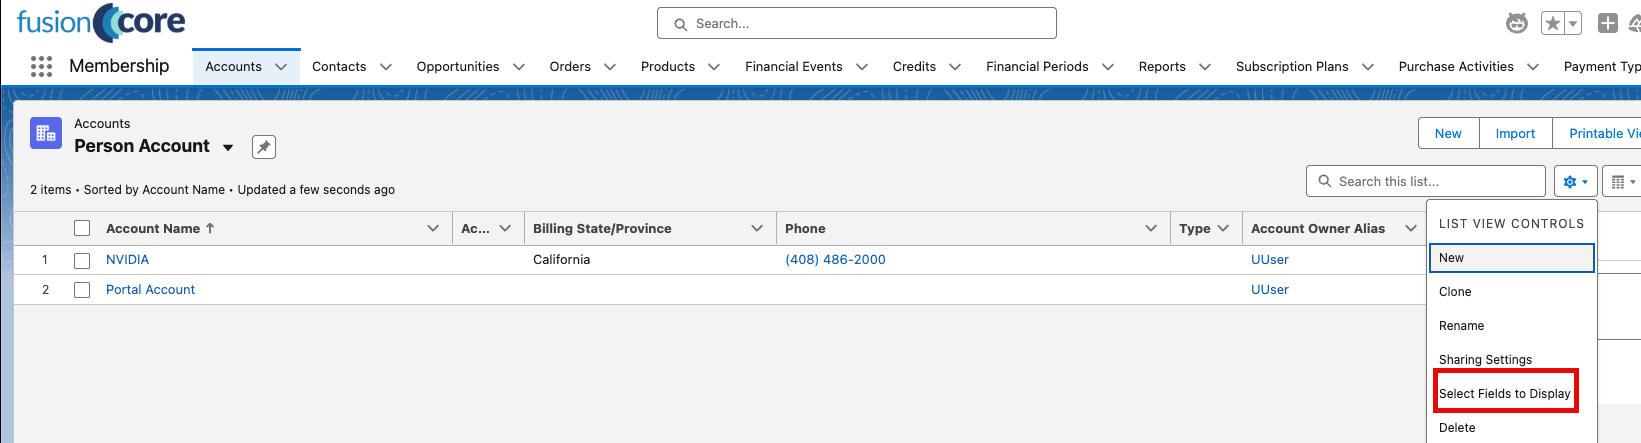
The Fields to Display panel with the selected columns.
Filter to Show Only Person Accounts
Open the filter panel
Set the owner filter
Add the Person Account filter
- Field: Is Person Account
- Operator: equals
- Value: True
Save
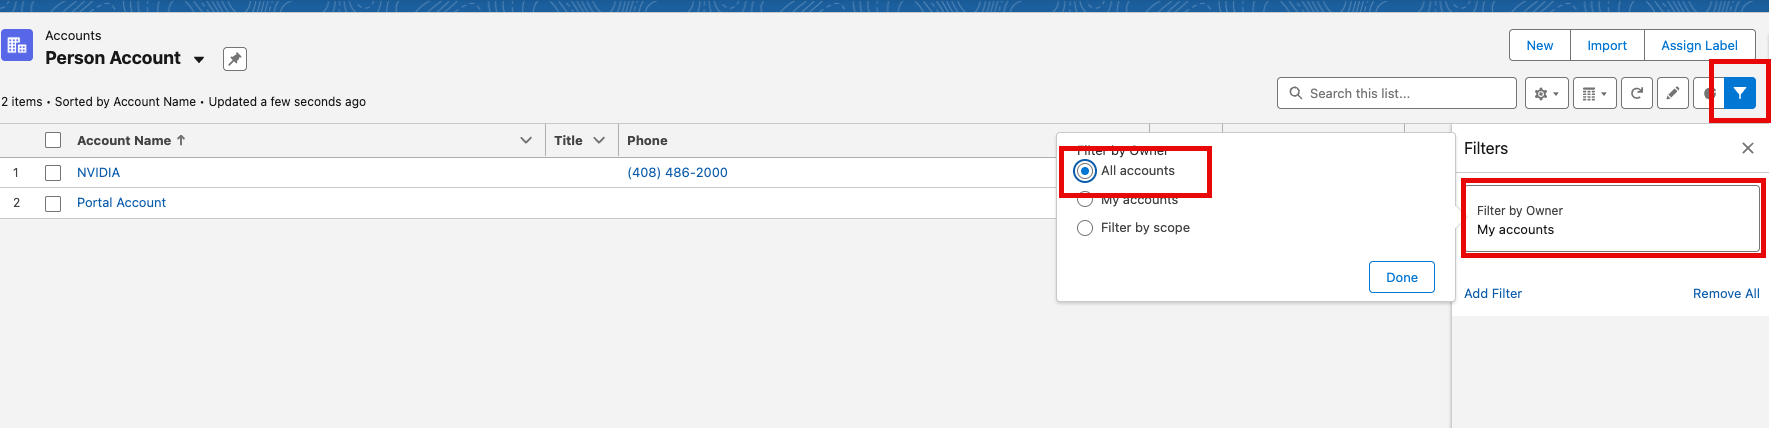
The filter panel with Is Person Account equals True.
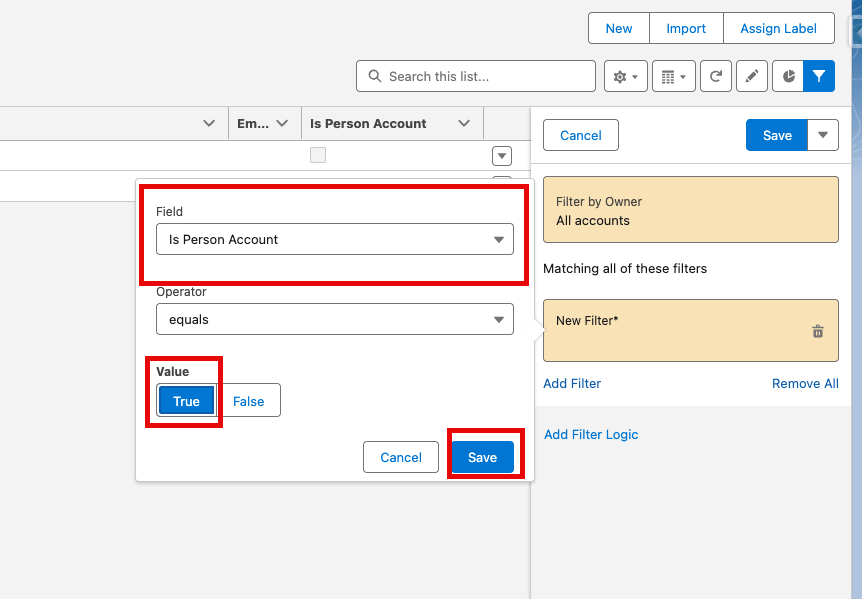
The filter applied to the list view.
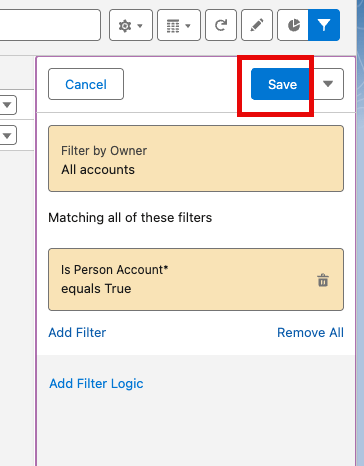
Saving the filtered list view.

The finished Person Accounts list view.
Limitations and Common Pitfalls
Keep these in mind as you set up and work with Person Accounts.- Enable the feature only after the record type exists. At least one profile must have a record type assigned for the Account object, or the readiness check will fail. Configure the business Account record type first.
- Person Account users cannot select the record type until you assign it to their profile. If users cannot create Person Accounts, confirm the Person Account record type is in the Selected Record Types list on their profile.
- The customer name can show blank or wrong if the layouts are not updated. fusionCore uses
FS_Customer__candFS_Customer_Name__cto resolve the individual on Order, Credit, Purchase Activity, Opportunity Line Item, and Order Item records. If those fields have not been added in place of the older non-FS_fields, the customer name can appear blank or incorrect for Person Accounts. - Fields can still appear empty even after layouts are updated. A user needs one of the fusionCore permission sets to see the business-data fields. Assign
FS Person Account - Manage Business DataorFS Person Account - View Business Datato users who need that access.